
A while back we posted a series on the mechanics of calculating the heat load of your home. At the end we promised to offer up an Excel file that is set up for you to do your own calculations without getting a headache or hand cramp
The calculator comes pre-filled with info from our Houston 2448. Everything in light yellow can be modified. The file or the rest of the cells are not locked. This should be considered open-source, AKA modify at your own risk. If you enter any values into white cells, you may destroy formulas. There are also no fail safes or error checking in here. Double check your work.
There are 7 components listed: slab, floor, walls above and below grade, windows, doors, and roof. Each of these has inputs for area and R-value. Note that windows should be input as U-value. When inputting wall area, don't take windows or doors into account. They are automatically deducted from the wall area in the calculations. Outside design temperature can be modified for the first four items; remaining values are derived from those.
All the work is shown on the following columns. The UA value, Δt and Btu/hr values are shown. Indoor temp can be changed to your desired setpoint. To the right is a little table with all sorts of nerdy calculations in it. Percent of load tells you which component is losing the most heat. Cost/hr tells you how much it costs. In the example you can see that more than half the heat loss in this house is through the walls. Of course! There is only R-15 in the walls! You can also see that increasing to R-21 doesn't do much for that factor. Increase the walls to R-30 and you can get that component down to about 1/3 of the heat load. Still high. Note that the rest of the load percentages change as you change the area or R-value of an item.
Lower down on the page is a place to take leakiness of the house into account. Input your target or measured ACH50 as well as volume of the home. You should only change the HC if you know what you're doing.
The final input is for number of bedrooms or potential bedrooms. This little calc will determine internal gains from humans. It takes the number of bedrooms and adds 1 person per ASHRAE standards. If there will only be two people living in your 3000sf house, enter one bedroom for kicks.
Total peak heating load is given near the bottom of the sheet. The final table gives an idea of how much of what types of heat is needed to keep the house comfortable. A forced air unit size and efficiency can be entered. As you can see, even this is WAY too big for the house. Even 2 1kW cadet heaters will do fine. In this case we would recommend a 500W heater in each of the bedrooms and bathrooms with a 1kW in the great room. Still a bit much but at least reasonable. Perhaps a mini-split heat pump would do for efficiency as well as adding some cooling if you are in the South.
This calculator should be used for entertainment purposes only. No guarantees about the results or performance of this tool are made or implied. If you break it, you bought it. If you find errors, please feel free to let us know. If somebody who knows javascript is bored, we would be thrilled to turn this into an online tool.
Tuesday, December 20, 2011
Tuesday, December 13, 2011
Massive Influx of Plans
In what might be described as an heroic maneuver, we at Istockhouseplans just cleared out a bunch of backlog and loaded more than a handful of plans. The final damage? Seven in one blow! Listed below is the latest additions to the lineup:
The Wilsada A 1416A joins her brother the Wilsada 1416. This tiny house duo are each a whopping 200sf. The bed is in its own nook, the rest of the space being open save for a bathroom. Therein is the difference. Wilsada has a narrow 4x6 bath while the A is a slightly more spacious 5x5. Otherwise the plans are very similar with their multitude of windows.
The Cottage in the Grove C2042 was a joint project with our builder friend last year. We finally got around to creating the artwork and writing the text for this one. This was a narrow 1356sf house that has the most charm of any of our offerings yet. Two suites each with bathrooms and a large open downstairs space.
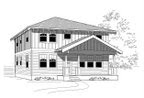
The Houston A 2448A steps in with a slightly larger footprint than his predecessor. The numbering belies his true width of 25'. Other than an even 1200sf, not much changed from the prior version. The roof line was modified to maintain the 16' roof plane.
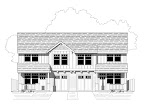
Three Edgewoods were finally put on display. A few years ago we spent alot of time with the original version creating several spin offs for our builder friend. The Edgewood C C2552C and The Edgewood D C2552D offer variations on the 25'-28' wide 3 bed 2 bath story-and-a-half theme. Rounding out the triad is the The Edgewood D2 C2552D-2 mashup. Not only is it a lot of width, it's also a lot of characters in the numerical coding!
Finally is a brand new plan inspired from a century ago. The Arleta 2850 adds a third true single story full size plan to our lineup (right behind the Houstons). At only 1353sf, this little charmer is guaranteed to be a winner in the new downsized home movement. Three beds, two baths, lots of closets, and both material and energy efficiency just enforce her future position in the marketplace. We're very excited about this one and hope to see it built soon.
Check out our full catalog for all plans.
The Wilsada A 1416A joins her brother the Wilsada 1416. This tiny house duo are each a whopping 200sf. The bed is in its own nook, the rest of the space being open save for a bathroom. Therein is the difference. Wilsada has a narrow 4x6 bath while the A is a slightly more spacious 5x5. Otherwise the plans are very similar with their multitude of windows.
The Cottage in the Grove C2042 was a joint project with our builder friend last year. We finally got around to creating the artwork and writing the text for this one. This was a narrow 1356sf house that has the most charm of any of our offerings yet. Two suites each with bathrooms and a large open downstairs space.
The Houston A 2448A steps in with a slightly larger footprint than his predecessor. The numbering belies his true width of 25'. Other than an even 1200sf, not much changed from the prior version. The roof line was modified to maintain the 16' roof plane.
Three Edgewoods were finally put on display. A few years ago we spent alot of time with the original version creating several spin offs for our builder friend. The Edgewood C C2552C and The Edgewood D C2552D offer variations on the 25'-28' wide 3 bed 2 bath story-and-a-half theme. Rounding out the triad is the The Edgewood D2 C2552D-2 mashup. Not only is it a lot of width, it's also a lot of characters in the numerical coding!
Finally is a brand new plan inspired from a century ago. The Arleta 2850 adds a third true single story full size plan to our lineup (right behind the Houstons). At only 1353sf, this little charmer is guaranteed to be a winner in the new downsized home movement. Three beds, two baths, lots of closets, and both material and energy efficiency just enforce her future position in the marketplace. We're very excited about this one and hope to see it built soon.
Check out our full catalog for all plans.
Tuesday, December 6, 2011
Energy Efficient Wall Systems
You may remember our post a couple of years ago promoting Fat Walls. In their 11/11 monthly newsletter, Energy Design Update recently reported on 15 different wall assemblies modeled through TRNSYS software. The walls were simulated in the climates typical to Atlanta, Pittsburgh, and Phoenix. Of the 15 walls, three tied in first place for an overall value of R-43. One of these walls fills a 2x6 cavity with closed cell polyurethane spray foam for a rather high price tag. The second wall involves 10" thick SIPS. The third wall is our option number four from the previously mentioned post with 2" more of foam. That is, a 2x6 wall with blow-in and 4" of outboard XPS foam. As we mentioned back when we wrote the initial post, this makes window detailing a bit of a bear. Attachment issues come into play as well. The advantage of this system is the standard wall framing and no loss of floor space inside the house.
A reasonable compromise might be 3" of foam. This allows the use of true 2x4 for bucking out windows while allowing 1/2" air space. Half inch furring strips can then be used over the foam for attachment as well as a rainscreen.
They also modeled a similar wall as our top choice, double 2x4, total 8" thick with 2" of outboard foam. Our results? R-40 with U-0.20 windows. Their results were R-38 with U-0.25 windows. As you should know, U-0.20 windows are slightly better than U-0.25 resulting in a slightly higher total wall R-value.
So apparently we know what we're doing!
Tuesday, November 22, 2011
New Tiny House Plan
We at Istockhouseplans have been busy developing a cadre of tiny house plans. Not every one makes the cut to be web-worthy. Most of them do however become inspiration for other plans. We are proud to introduce our latest plan, the Wilsada 1416.
Several things inspired this plan. One was simple lines. The plan is a simple box with one tip out and three ridges. Generous light also came into play. A sliding glass door provides entry on one side while a bank of windows opens up a view on another side. The third was tiny bathrooms. We first introduced a complete wet room in the Carver cabin series. We continue the idea in the Wilsada. Finally, we have been recently enamored with the idea of sleeping nooks. Rather than a formal bedroom, the Wilsada contains a very cozy bed nook. Visualize curtains over the opening and a little bookcase at the foot. And of course it's elevated allowing for storage underneath.
A kitchenette, sitting porch, and vaulted ceiling complete the look. Despite our generally craftsman motifs, we could easily see this one decked in white beadboard. Somewhat of an East Coast beach theme. Probably not appropriate for a mountain retreat. Or maybe that's just the kind of irony that you go for.
Tuesday, November 8, 2011
IKEA Loves Small Homes
If you've received your copy of the 2012 IKEA catalog, you may have noticed a theme. We at Istockhouseplans were thrilled to read the phrase on the front: "A HOME DOESN'T NEED TO BE BIG, JUST SMART." Bravo IKEA, bravo!
The first couple of pages immediately show some ideas that the IKEA design team put together. They created a space for 6 friends to live in within 430 square feet. The solution consists of curtained bunkbeds at the edge with a large table in the middle. All other space is communal.
Their second challenge was a 75 square foot kitchen. IKEA was able to get an island and plenty of storage in the small space. Other layouts are shown starting on page 112. If these still aren't inspiration enough, you can go to IKEA's website and use their kitchen design software.
The next challenge was a 118 square foot living-slash-bedroom-slash-playroom. The central feature is a loft bed for the grown-ups. Another variation is shown in a 107 square foot living room that is essentially a showcase room for a chaise lounge.
The final design involves a 29 square foot bathroom - with laundry space and a spa tub. There must be some smoke and mirrors here because no good ol' 'Merican spa tub would be less than 29sf itself, right?
To see videos showcasing all of these ideas, visit IKEA-USA.com/smallspaces.
The coup de grace of all of this for us was the new Lillangen single bowl sink. One of our favorite things is to make secondary rooms (powder baths especially) as small as possible. Building code dictates some minimum sizes needed around fixtures. At some point to get smaller, the fixtures need to shrink. We can specify a smaller sink only to have the contractor turn it down because of cost. (Why are smaller appliances, fixtures, and doodads so much more expensive anyway?) IKEA's previously mentioned sink is less than 11" in depth with a side faucet (faucet sold separately). Price for the ceramic, $49.99. Price for faucets starting at $39.99. Less than $100 to reduce the size of the house, or give that space to another use.
Of course this is all good news for our line of tiny homes. If you try to design a tiny home as a mini-McMansion you will fail. But with IKEA and a little ingenuity you can make anything happen.
*Full disclosure: IKEA has no idea I wrote this blog post.
Tuesday, October 25, 2011
Calculating Even More Heat Load
Welcome back to the third and final installment of calculating heat load. In Part I we looked at the envelope of the home. In Part II we looked at air infiltration and how it works. In this part we will look at internal loads and finally deciding what heat source to add to a home.
We realized that we should have been giving a real world example from the start. In light of that, let's do some quick review using our plan The Belmont #3232. If you recall the equations:
For air infiltration, recall the formula ΔT x ACHnat x Volume x HC = BTU/hr. Our ΔT=45°F, volume is 18432 (32x32x18), HC = 0.022, and we'll assume ACHnat to be based off of a blower door test of 5.0ACH, ergo .25.
Now for the good news! You will have several internal loads that will help to heat your house, that is, they will make this number smaller. The biggest source is the occupants. General convention assumes that there will be 2 people in the master bedroom and one person for each of the other bedrooms. The Belmont is a 4 bedroom home but practically we could assume four occupants living upstairs. Occupants put out anywhere from 200 to 300 btu/hr of heat load. We are preferential towards 275 btu/hr. For four people, this is a reduction of 1100 btu/hr. You can also figure in incandescent lights, the kitchen oven, hair dryers and other such pieces. These don't make a huge difference unless your heat load is so low that you are in PassivHaus range.
Our final result for heating this home in this scenario is 14861.52 btu/hr. Now what? Now we need a heat source. Our first choice might be the typical forced air gas furnace. A quick look at manufacturer catalogs will reveal that 40,000 btu/hr is the smallest one available. Even at a low 90% efficiency this will put out 36,000 btu/hr. But if you have an attached garage, you can always place the furnace there and lose about 40% of your heat bringing the load down to about 25,700 btu/hr. Let's not.
Another option might be electric wall heaters. Each 1kW wall heater = 3412 btu/hr. This calculates to needing 5 heaters. Reviewing this plan shows that there are up to 10 rooms that would need heat. Perhaps several 500W units would be more applicable. Don't forget to install them on an interior wall.
Another choice is a ductless heat pump. You are limited to a max of 4 heads per unit. More heads requires another unit which doubles the price. Or you could get a splitter for some of the heads and share the heat load between rooms. To outfit the Belmont 3232 you would need one head for the dining/parlor, one split head for the office/bath, another for the master and bath, one more for the auxiliary bedrooms. The kitchen, utility room and bathroom would need a 500W electric heat source.
Another option might be radiant heat. In floor hydronic heat puts out 18-25 btu/sf. Assuming 20btu, you could cover 743sf of the floor with tubing. But how do you cover 743sf in a 2000sf house? If you stick to just the walk areas you could make it happen. But unless you are doing an onsite DIY approach, this option can be super expensive.
The final choice would be to increase some insulation in the walls, try for better windows (U-0.025 is reasonable) and tighten the home to 2.0 ACH or less. Resulting calculations reduces to 10519 btu/hr. Then install an HRV in the utility room to cycle fresh air and attach a small heating unit to it.
Any other ideas?
In the very near future we'll refine our simple spreadsheet calculator and make it available for your use. The calculator does most of the math for you but we made this guide available so you'd know what's going on in the background. Happy calculating!
We realized that we should have been giving a real world example from the start. In light of that, let's do some quick review using our plan The Belmont #3232. If you recall the equations:
- Afloor x Ufloor x ΔTfloor = Btu/hr floor
- Awall x Uwall x ΔTwall = Btu/hr wall
- Aceil x Uceil x ΔTceil = Btu/hr ceil
- Awindows x Uwindows x ΔTwindows = Btu/hr windows
- Adoor x Udoor x ΔTdoor = Btu/hr door
- Floors: (32x32) x (1/38) x 25°F = 673.68 (1024sf insulated floor, R-38 in joists)
- Walls: (32x18x4 - 339.33) x (1/21*.8) x 45°F = 5262.51 (four walls minus windows, 32'L x 18'H, R-21 with framing factor)
- Ceiling: (32x32) x (1/49*.8) x 25°F = 522.45 (1024sf ceiling, R-49 with framing factor due to edge pinch)
- Windows: 339.33 x 0.30 x 45°F = 4580.96
- Doors: 40 x 0.20 x 45°F = 360
For air infiltration, recall the formula ΔT x ACHnat x Volume x HC = BTU/hr. Our ΔT=45°F, volume is 18432 (32x32x18), HC = 0.022, and we'll assume ACHnat to be based off of a blower door test of 5.0ACH, ergo .25.
- 45°F x .25 x 18432 x 0.022 = 4561.92
Now for the good news! You will have several internal loads that will help to heat your house, that is, they will make this number smaller. The biggest source is the occupants. General convention assumes that there will be 2 people in the master bedroom and one person for each of the other bedrooms. The Belmont is a 4 bedroom home but practically we could assume four occupants living upstairs. Occupants put out anywhere from 200 to 300 btu/hr of heat load. We are preferential towards 275 btu/hr. For four people, this is a reduction of 1100 btu/hr. You can also figure in incandescent lights, the kitchen oven, hair dryers and other such pieces. These don't make a huge difference unless your heat load is so low that you are in PassivHaus range.
Our final result for heating this home in this scenario is 14861.52 btu/hr. Now what? Now we need a heat source. Our first choice might be the typical forced air gas furnace. A quick look at manufacturer catalogs will reveal that 40,000 btu/hr is the smallest one available. Even at a low 90% efficiency this will put out 36,000 btu/hr. But if you have an attached garage, you can always place the furnace there and lose about 40% of your heat bringing the load down to about 25,700 btu/hr. Let's not.
Another option might be electric wall heaters. Each 1kW wall heater = 3412 btu/hr. This calculates to needing 5 heaters. Reviewing this plan shows that there are up to 10 rooms that would need heat. Perhaps several 500W units would be more applicable. Don't forget to install them on an interior wall.
Another choice is a ductless heat pump. You are limited to a max of 4 heads per unit. More heads requires another unit which doubles the price. Or you could get a splitter for some of the heads and share the heat load between rooms. To outfit the Belmont 3232 you would need one head for the dining/parlor, one split head for the office/bath, another for the master and bath, one more for the auxiliary bedrooms. The kitchen, utility room and bathroom would need a 500W electric heat source.
Another option might be radiant heat. In floor hydronic heat puts out 18-25 btu/sf. Assuming 20btu, you could cover 743sf of the floor with tubing. But how do you cover 743sf in a 2000sf house? If you stick to just the walk areas you could make it happen. But unless you are doing an onsite DIY approach, this option can be super expensive.
The final choice would be to increase some insulation in the walls, try for better windows (U-0.025 is reasonable) and tighten the home to 2.0 ACH or less. Resulting calculations reduces to 10519 btu/hr. Then install an HRV in the utility room to cycle fresh air and attach a small heating unit to it.
Any other ideas?
In the very near future we'll refine our simple spreadsheet calculator and make it available for your use. The calculator does most of the math for you but we made this guide available so you'd know what's going on in the background. Happy calculating!
Tuesday, October 18, 2011
Calculating More Heat Load
Last week we looked at how to calculate your heat load based on the envelope of your home. This week we'll take a look at air infiltration and the effect it can have on your home. The caveat should be given that the tighter you make your home, the more you should be concerned about vapor barriers, retarders, and other management. Indoor air quality also becomes a concern. We won't address these issues in this post.
Air infiltration is not something that can be assumed or calculated. Just as a nail can't be driven by estimation, it needs a tool. The most common tool used is a blower door. This is a device that attaches into your front door frame and accepts a large industrial fan. After closing all other doors and windows, the fan is turned on (generally pointing out) until it is removing 50 cubic feet per minute (CFM) from your home. Some places in the world aim for 25 CFM. For a visual, imagine 4 regulation basketballs. This is 1 cubic foot. So turning the blower door on to 50 CFM means that you are throwing 200 basketballs out your front door every minute (or more than 3 every second!)
Why in the world would you do this? A couple of reasons. First, this is a great opportunity to walk around your house with a smoke stick and see where air is leaking in. These are places that need to be plugged. Get your caulk, foam, whatever and fill it up.
Second, since there is diagnostic equipment hooked to the blower door, a technician can determine how much air will blow through your home on a windy day. The result is a standardized answer that can be used for comparison. Generally it is in the range of 0-20 air changes per hour (ACH). This means that with the blower door running, the volume of air in your home could be changed out 20 times an hour. Every 3 minutes you're getting new air. This air is coming from outside, the attic, the crawlspace, and the attached garage.
Most newer homes fall around 6 ACH50. Older homes will be much higher. It takes some determination to lower a new home from 6 ACH50. No one accidentally builds a tight home. With some simple effort we have seen homes approach 4 ACH50. A bit more effort and change in building methods results in 2 ACH50 which is very good. The lowest we've ever seen is 0.22 ACH50. This was a home built to PassivHaus standards.
So why does this matter for energy calculations? Warm air can be blown out of your home and replaced with cool winter air through leaks. We need to calculate for this for the furnace to be able to keep up. Otherwise your home will get cooler and cooler until it equalizes with the outdoors. This could occur with a 3000sf leaky home and a 40kBTU furnace. Bad news.
Less talking, more computing. This is one single formula that has a lot of lead up. There are four numbers in the formula. The first is our friend ΔT. The second is the result of your blower door test in ACH50. We need natural ACH so divide by 20. The third is the volume of your heated area. The fourth is the convective heat transfer co-efficient (HC). This number has a general range around 0.018 to 0.022:
ΔT x ACHnat x Volume x HC = BTU/hr
Example: A 1500sf house has a blower door result of 3.5ACH50. Assume HC to be 0.022 (Marine Cold). What is the heat loss through infiltration?
Answer: ΔT from last week is still 45°F. ACHnat = ACH50/20 which is 3.5/20 = 0.175. Volume is approximately 1500sf x 9' (ceilings) = 13500cf. HC is stated. So the formula is 45 x 0.175 x 13500 x 0.022 = 2339 BTU/hr. Note that we gave a tightness that is half of typical. Were it 7 ACH50 this load would double! Don't think air tightness matters? It's the biggest factor in heat load.
Add this to your envelope load and come back next week for part three, Interior Loads!
Tuesday, October 11, 2011
Calculating Heat Load
How many times have you looked at a house plan or a house and wondered how much heat it was going to use per year, or need at peak times? There are several good programs out there that will allow you to do this with a few mouse clicks. Maybe you don't have access to such a program and want to make an educated guess. There are several simple calculations that you can do to figure out the answer.
What we are figuring out is the amount of heat that is lost from the house in several ways. One way is by conduction through the envelope. Another way is by convection through leaks in the house. Most factors are known but several need to be looked up. Once you know those values for your area, you can use them again and again.
Let's establish those values. First you will need to establish your highest desired indoor temperature. During winter this might be 62°F or 65°F or 68°F. We'll use 65°F for this guide. Next you'll want to establish the coldest outdoor temperature that might be experienced. For the walls this might be 20°F or 0°F or -20°F if you're in Alaska. We'll assume 20°F for this guide.
Beware however that your crawlspace and attic will have different cold temperatures. If your insulation is in the ceiling plane instead of the roof plane, your attic will enjoy the comfort of being enclosed even though it won't be insulated. Therefore in 20°F weather the attic may register at 40°F. The same situation is present in the crawl space, especially if it's vented and any walls adjacent to a garage. We'll use 40°F for these three locations.
Using these temperatures establish a difference of temperature known as ΔT (delta-T). This is simply subtracting the coldest outside temperature from the desired indoor temperature. Using our established values the walls, windows, and exterior doors will have a ΔT of 45°F and the crawl space and attic will have a ΔT of 25°F.
Next you'll need to gather the areas of each of the parts of your building envelope. This includes floors, walls, ceilings, windows, and doors. Rather than figure the exact wall area, imagine there are no windows or doors. Then when you do the window and door areas, you can subtract them from the wall area to get a more accurate reading with less calculation. If you want to be especially precise, you can note the amount of wall against the garage, second floor walls against first floor attics, etc. We'll skip that precision.
The other thing you'll need to gather is the U-value of those components. U-value is the inverse of R-value. U-value should also take into account the whole assembly and not just the insulation itself. An R-21 batt does not equal an R-21 wall. A typical R-21 wall will end up at about R-16, that is, a U-value of 1/16 or .0625. A simple true R-value conversion can be had by multiplying your insulation R-value by a factor depending on quality. For a standard average build, assume 75% of your insulation value. For good construction (24" o.c. R-30 wall for example) assume 80%. If you're using exterior foam, figure your percentage value and then add the foam. For instance, an average R-21 wall works out to about R-16 but adding 1-1/2" of XPS foam adds R-7.5 for a total of R-23.5, U-value of .0426. More precision is better but don't go crazy.
Let's put it all together:
The general equation for each element is area x u-value x ΔT. You should write down the following:
Next week: Infiltration!
What we are figuring out is the amount of heat that is lost from the house in several ways. One way is by conduction through the envelope. Another way is by convection through leaks in the house. Most factors are known but several need to be looked up. Once you know those values for your area, you can use them again and again.
Let's establish those values. First you will need to establish your highest desired indoor temperature. During winter this might be 62°F or 65°F or 68°F. We'll use 65°F for this guide. Next you'll want to establish the coldest outdoor temperature that might be experienced. For the walls this might be 20°F or 0°F or -20°F if you're in Alaska. We'll assume 20°F for this guide.
Beware however that your crawlspace and attic will have different cold temperatures. If your insulation is in the ceiling plane instead of the roof plane, your attic will enjoy the comfort of being enclosed even though it won't be insulated. Therefore in 20°F weather the attic may register at 40°F. The same situation is present in the crawl space, especially if it's vented and any walls adjacent to a garage. We'll use 40°F for these three locations.
Using these temperatures establish a difference of temperature known as ΔT (delta-T). This is simply subtracting the coldest outside temperature from the desired indoor temperature. Using our established values the walls, windows, and exterior doors will have a ΔT of 45°F and the crawl space and attic will have a ΔT of 25°F.
Next you'll need to gather the areas of each of the parts of your building envelope. This includes floors, walls, ceilings, windows, and doors. Rather than figure the exact wall area, imagine there are no windows or doors. Then when you do the window and door areas, you can subtract them from the wall area to get a more accurate reading with less calculation. If you want to be especially precise, you can note the amount of wall against the garage, second floor walls against first floor attics, etc. We'll skip that precision.
The other thing you'll need to gather is the U-value of those components. U-value is the inverse of R-value. U-value should also take into account the whole assembly and not just the insulation itself. An R-21 batt does not equal an R-21 wall. A typical R-21 wall will end up at about R-16, that is, a U-value of 1/16 or .0625. A simple true R-value conversion can be had by multiplying your insulation R-value by a factor depending on quality. For a standard average build, assume 75% of your insulation value. For good construction (24" o.c. R-30 wall for example) assume 80%. If you're using exterior foam, figure your percentage value and then add the foam. For instance, an average R-21 wall works out to about R-16 but adding 1-1/2" of XPS foam adds R-7.5 for a total of R-23.5, U-value of .0426. More precision is better but don't go crazy.
Let's put it all together:
The general equation for each element is area x u-value x ΔT. You should write down the following:
- Afloor x Ufloor x ΔTfloor = Btu/hr floor
- Awall x Uwall x ΔTwall = Btu/hr wall
- Aceil x Uceil x ΔTceil = Btu/hr ceil
- Awindows x Uwindows x ΔTwindows = Btu/hr windows
- Adoor x Udoor x ΔTdoor = Btu/hr door
Next week: Infiltration!
Tuesday, September 27, 2011
Istockhouseplans Gets Greener
As more and more companies are beginning to do a life cycle analysis of their products, Istockhouseplans feels that this is a worthwhile study to pursue. Generally we will send you a half dozen sets of plans. Most of those will go to the permitting jurisdiction for approval; some of those you will give out to subs to do their work. What's left is a few sets around the jobsite that get muddy, or a couple extra sets that get stuck under the seat of your F-350. We've compiled this list of how you can safely, humanely, and environmentally end the life of those plans.
Other ideas? Please feel free to share in the comments. Want to employ some of these ideas yourself? Visit our plan catalog and purchase your own set.
- Recycle them in the paper bin. Duh.
- Ship them back to us for proper disposal.
- Shred them for landscaping mulch.
- Shred them for attic insulation.
- Shred them for party confetti.
- Sweep up your wood dust and roll it up into a set of plans. Smash the ends in and leave a few next to the woodstove or outdoor fireplace for the new homeowner to burn.
- If you have a nice set leftover, present them to the homeowner. Possibly even in a frame. Or take the time to mount them over the fireplace yourself. Build the frame out of scrap wood from the site.
- If a set gets too muddy to use, wrinkle it up good, re-flatten it and set it in front of an exterior door for a shoe mat.
- Cut strips to use if you run out of drywall tape.
- Separate the sheets and fold them into origami for the children who are pressing their faces into your cyclone fence.
- Let your kids color the elevations.
- Use the backs as large blank sheets for your kids to color on.
- Make holiday cards for your subs/supers/suppliers using the elevations or details as the front picture.
Other ideas? Please feel free to share in the comments. Want to employ some of these ideas yourself? Visit our plan catalog and purchase your own set.
Wednesday, September 14, 2011
Lumber Sizes
Ever notice that a 2x4 isn't really 2"x4"? What's with that? Fact is that the piece of wood started at 2"x4" but is called "rough sawn", that is it has unfinished faces. The stick is then sent through a planer to smooth the faces and reduce serious splinter casualties. About 1/4" is shaved off of each of the four faces resulting in a lesser dimension than you would expect. Besides, who would want to say "one-and-a-half by three-and-a-half"? Mind the twist at 2x8 and beyond...
Now pay attention as we mention dimension convention:
1x:
2x:
And while we're at it, how about some typical engineered wood sizes.
I-joists are created by standing a piece of OSB or plywood upright and capping it with a 2x flange. The result looks like a capital serif 'I' hence the name.
I-joist flange widths (varies by manufacturer):
LVL widths:
Glu-lam beams are created by gluing and compressing several layers of post milled dimensional lumber together. The whole beam is then planed again to create an even surface. For this reason, glu-lam beams are slightly narrower than dimensional lumber. *The industry has recently changed to also offer Gle-lams in full 5-1/2" widths as well. Heights are always in multiples of 1-1/2" due to the size of the plies. *The industry has recently changed to offer heights that are consistent with solid sawn and engineered lumber as well. Due to general engineering practice the height should always exceed the width though rare exceptions always exist.
Glu-lam widths:
Now pay attention as we mention dimension convention:
1x:
- 1x2 = .75" x 1.5"
- 1x3 = .75" x 2.5"
- 1x4 = .75" x 3.5"
- 1x6 = .75" x 5.5"
- 1x8 = .75" x 7.5"
- 1x10 = .75" x 9.5"
- 1x12 = .75" x 11.5"
2x:
- 2x2 = 1.5" x 1.5"
- 2x3 = 1.5" x 2.5"
- 2x4 = 1.5" x 3.5"
- 2x6 = 1.5" x 5.5"
- 2x8 = 1.5" x 7.25"
- 2x10 = 1.5" x 9.25"
- 2x12 = 1.5" x 11.25"
- 2x14 = 1.5" x 13.25"
- 3x4 = 2.5" x 3.5"
- 3x6 = 2.5" x 5.5"
- 4x4 = 3.5" x 3.5"
- 4x6 = 3.5" x 5.5"
- 4x8 = 3.5" x 7.25"
- 4x10 = 3.5" x 9.25"
- 4x12 = 3.5" x 11.25"
- 4x14 = 3.5" x 13.25"
And while we're at it, how about some typical engineered wood sizes.
I-joists are created by standing a piece of OSB or plywood upright and capping it with a 2x flange. The result looks like a capital serif 'I' hence the name.
I-joist flange widths (varies by manufacturer):
- 1-3/4"
- 2"
- 2-5/16"
- 3-1/2"
- 9-1/2"
- 11-7/8"
- 14"
- 16"
- 18"
- 20"
- 22"
- 24"
LVL widths:
- 1-3/4" (2 layers)
- 2-5/8" (3 layers)
- 3-1/2" (4 layers)
- 5-1/4" (6 layers)
- 7" (8 layers)
- Any height possible though generally intended to match I-joist material. Can match dimensional as well.
Glu-lam beams are created by gluing and compressing several layers of post milled dimensional lumber together. The whole beam is then planed again to create an even surface. For this reason, glu-lam beams are slightly narrower than dimensional lumber. *The industry has recently changed to also offer Gle-lams in full 5-1/2" widths as well. Heights are always in multiples of 1-1/2" due to the size of the plies. *The industry has recently changed to offer heights that are consistent with solid sawn and engineered lumber as well. Due to general engineering practice the height should always exceed the width though rare exceptions always exist.
Glu-lam widths:
- 3-1/8"
- 3-1/2"
- 5-1/8"
- 5-1/2"
- 6-3/4"
- 7-1/4"
- 8-3/4"
- 9-1/4"
- 10-3/4"
- 6"
- 7.5"
- 9"
- 9.5"
- 10.5"
- 11.875"
- 12"
- 13.5"
- 14"
- 15"
- 16.5"
- 18"
- 19.5"
- 21"
- 22.5"
- 24"
Tuesday, August 30, 2011
Free Plans part 4
As we wrap up August and the month of free, we offer one more plan for your enjoyment. Last week we promised two new plans but the dog ate part of our homework. So we're left with one final flagship plan to introduce.
The Ramapo is 12' long and 8' deep covering 96sf. It sports a single shed roof with clerestory windows on the tall wall. This was originally designed as a bunkhouse for a rural property. It's big enough to get a bed and bathroomette and closet in. Or loft the bed and increase the floor space.
This may be the last of the free blitzkrieg for a while but it won't be the last of the free plans forever. There are a few variants on the current plans that we would like to add, plus some new ideas. In the meantime we need to attend to some other business. If you have a particular idea that you would like to see, post it here or send it to us and we'd be happy to give it a go.
Tuesday, August 23, 2011
Free Plans part 3
More free than you can shake a stud at! The third of our free plans, the Watson 88 has been released into the public. The Watson is a simple 8'x8' building that anybody could build in a week. We've kept the 2x3 wall studs but 2x4 would be perfectly appropriate at this point. Some gridded windows and a small front porch create an appeal that's hard to pass up. The uses for this building are as vast as your imagination. At this size we're bordering on the edge of playhouse and small house. Istockhouseplans has two more basic sizes to offer and... oh shoot, there's only one Tuesday left in August. I guess our back to school special includes our flagship free plan.
We better get cracking. In the meantime download the plans, build the shed, and give us your feedback. Maybe we should have a contest with the most innovative use of materials in one of our sheds...
We better get cracking. In the meantime download the plans, build the shed, and give us your feedback. Maybe we should have a contest with the most innovative use of materials in one of our sheds...
Tuesday, August 16, 2011
Free Plans part 2
A couple of weeks ago we introduced you to our new free plans. We've added another to our portfolio and are thrilled to share with you.
Following the theme of defunct stops on the Springwater Trolley line in Portland, the Kendall 84 is named for the stop that was at 82nd Avenue. This is similar to the Bell 66 we launched prior except that this is in a more expected straight line format rather than an L shape. More like a backhoe loader, if you will. In fact that gives us another idea for decorating the structure. Lose the porch, slope the roof from left to right and add some extra wood to the front and back. Paint it all yellow and be the dirt digger you always wanted to be, all from the comfort of your 5-point office chair with lumbar support.
As long as our hosting provider doesn't freeze up again, we hope to release one more each for the remaining Tuesdays in August. Expect two more free plans from us and then more sporadically through the rest of the year.
Built this? Link to your picture in the comments and share with us!
Wednesday, August 3, 2011
Free Plans!
We may be a day late but if you are a dollar short you are no longer up a creek. Istockhouseplans is proud to introduce our first free plan. Now granted you probably couldn't live in it but it does at least provide some quiet space for you to work, read, meditate, or pursue a hobby. Named for a defunct station on the old Springwater Railroad Line, the Bell 66 is small and could be a ticket booth as well. Post office? Dry goods? Vault? Almost too many options.
Plans can be downloaded directly from our website in 11x17 pdf format. Full wall framing details are included. Some cut lists and guides should help even the most ham-handed builder to at least kludge together a reasonable facsimile in a weekend or two. You may notice on the plans that the wall studs are 2x3 @ 24" o.c. The obvious reason should be in order to increase the usable space as much as possible. If you were really creative you could use 2x2 framing. Our suggestion would be to tack a 2x2 onto a 2x4 for the corners. Maybe you could even consider 1" plywood edge screwed to each other but then you lose insulation and effective window installation.
"Are these plans really free? What's the catch? Will you harvest my IP data and spam me?" We may look at your IP data but our only motive is to encourage you to visit our site and see what other great stuff we have to offer as well. We also plan on releasing some other small free plans over the next several months. Something you'd like to see in the 100sf and less range? Let us know and we'll do something with it!
Built this? Link to your picture in the comments and share with us!
Tuesday, July 19, 2011
Addition vs. Addition
Spy vs. Spy with a twist! The English language is such that two phrases that sound very similar can mean very different things. In this post we will be exploring the differences and similarities of the phrases "A New Addition to Your Home" vs. "A New Addition to Your House".
I think most folks understand that a house is a structure and a home is the entity that dwells in and among the house including the occupants, behaviors, and the structure itself. We've recently experienced a new addition to our home (which explains our radio silence for the past month).
A new addition to your house is:
- Noisy
- Costly
- Invasive
- Bulky
- Sleep depriving
- Time consuming
- May include some screaming in the process
- Requires lots of planning
- Requires several professionals
- Requires a permit and/or license
- A lovely thing five years later
- Can pay you back when you move to the next stage of life.
- Noisy
- Costly
- Invasive
- Bulky
- Sleep depriving
- Time consuming
- May include some screaming in the process
- Requires lots of planning
- Requires several professionals
- Strangely, DOES NOT require a permit and/or license
- A lovely thing five years later
- Can pay you back when you move to the next stage of life.
Tuesday, June 21, 2011
Welcome Summer!
Happy summer! On this first day of post-Spring we are pleased to announce that sun is in the forecast for the next several days. To welcome the sun (and since it has lightened our moods considerably) we are offering a sale that lasts through Labor Day. Any purchase of $250 or more can get 20% off by using the code 'summer11'. Shipping is still free and so is this blog. We will be winding down the designs a bit for the next few months while we take advantage of the lack of rain to focus on our spin-off, Dragonfly Trailers. Eager to use our hammers we've been working on building a small travel trailer. With any luck it will be ready in time for summer camping.
Visit Istockhouseplans to review our plans and pick your favorite. Kind of like a puppy.
Visit Istockhouseplans to review our plans and pick your favorite. Kind of like a puppy.
Tuesday, June 7, 2011
Beneath the Maple Tree
It's been a while since Istockhouseplans has released a new plan. Part of that is not feeling that what comes up is good enough for inclusion. Then there's the whole bit about keeping with our new model of smaller homes. To fill the void, we've let inspiration take hold. A railroad building at Union Station in Portland, Oregon gave us inspiration for a multi-use building. The structure is about 16x24', two stories and bricked out. We thought this would make a great garage model and ran with it. The Maple Garage G201 was born. The building is 16x24 of garage (or shop) below. The upstairs is 384sf of office, studio, or apartment. The bathroom is only a half bath and the kitchen only denotes a sink. However you are not strictly limited to what our drawings represent. Were you to want to use the upstairs as a true living quarters, the bathroom could increase a touch and the kitchen be further decked in appliances. The stairs are on the outside of the building which allows for true separation of uses. Got a piece of land to squat? Consider planting a Maple and grow from there!
Tuesday, May 24, 2011
Net Zero 100%
Meritage Homes, one of the nation's biggest builders has committed to building Net Zero Homes as their new building model. In some communities this is mostly true. They'll build about 75% better than code and give the homeowner the option to solarize the home to net zero. But this is not a complaint. For a large production builder to have found a net zero sweet spot raises the bar pretty high. So high in fact that many builders will either have to follow suit or get out.
http://www.greenbuildermag.com/News/Headlines/Net-Zero-for-the-Masses
How about you? Think you're good enough to net zero or will you keep playing with your old deflated ball? Need some help? Contact Istockhouseplans for plans that can help you achieve Net Zero Energy Use.
http://www.greenbuildermag.com/News/Headlines/Net-Zero-for-the-Masses
How about you? Think you're good enough to net zero or will you keep playing with your old deflated ball? Need some help? Contact Istockhouseplans for plans that can help you achieve Net Zero Energy Use.
Tuesday, May 17, 2011
Tiny Housing Advantages
In the spirit of laziness (or perhaps minimalism) we thought we'd share this blog post with you. It epitomizes everything we feel about why small homes are the way to go.
Tiny Housing Advantages
Tiny Housing Advantages
Tuesday, May 3, 2011
Builder vs. Homeowner
In our final installment we bring you the Builder vs. the Homeowner. Oh sure, we could bring in building officials, subcontractors, neighbors, bankers, etc. But this series of three neatly sums up what we work with the most. Hopefully the point has not been taken that everyone's an imbecile. Rather you should understand that communication is the key to a successful home build where everyone is happy.
That or everyone learning to design and build their own homes (cf . http://www.homehumor.com/introduction.shtml).
Homeowner: "We'd like to have you build a house for us. You come highly recommended and we've seen some of your other stuff. We have a pretty specific list of things we would like for trim, cabinets, etc. Other than that we'll leave it to you."
Builder: "I generally build to three different packages of trim. If you'd like something else we can discuss that. Do you have plans?"
H: "Well we had a designer draw up these..."
B: (perusing plans) "Hmmm... You could save a lot of money if you installed slider windows instead of double-hungs. And the roof will be cheaper if you drop it to a 5:12 pitch. And what's this note? 24" o.c. studs? Can't do that, the house will fall down. Besides, it costs more."
H: "Wait, it costs more to install less wood?"
B: "Oh sure, there's all sorts of other things you have to do instead. And I can't insulate the attic 'cuz your shingles will fail. It's alright if the furnace is in a cold attic."
H: "Well, you're the professional..."
What then happens is that the homeowner moves into a house that they're never truly happy with. They notice the little things. And they live there for 5 years and then do a complete remodel.
H: "Well thanks for your opinions, we'll call you." (we know what that line means)
Future homeowner interviews several other builders and finds one who is happy to build a home for the owners, the way they want. Double hung windows, knotty pine trim, and walls with studs 24" o.c. Builder also recommends a heat pump and the homeowners never look back.
Hey homeowner! If you approach a builder about building a house, please remember one thing. It's your house! Don't let anybody change your mind about what you want. The remodel 5 years down the road costs more than implementing all the things you want the first time around. Istockhouseplans hopes your dream home gets built the way you like the first time around.
That or everyone learning to design and build their own homes (cf . http://www.homehumor.com/introduction.shtml).
Homeowner: "We'd like to have you build a house for us. You come highly recommended and we've seen some of your other stuff. We have a pretty specific list of things we would like for trim, cabinets, etc. Other than that we'll leave it to you."
Builder: "I generally build to three different packages of trim. If you'd like something else we can discuss that. Do you have plans?"
H: "Well we had a designer draw up these..."
B: (perusing plans) "Hmmm... You could save a lot of money if you installed slider windows instead of double-hungs. And the roof will be cheaper if you drop it to a 5:12 pitch. And what's this note? 24" o.c. studs? Can't do that, the house will fall down. Besides, it costs more."
H: "Wait, it costs more to install less wood?"
B: "Oh sure, there's all sorts of other things you have to do instead. And I can't insulate the attic 'cuz your shingles will fail. It's alright if the furnace is in a cold attic."
H: "Well, you're the professional..."
What then happens is that the homeowner moves into a house that they're never truly happy with. They notice the little things. And they live there for 5 years and then do a complete remodel.
Alternate ending!
H: "Well thanks for your opinions, we'll call you." (we know what that line means)
Future homeowner interviews several other builders and finds one who is happy to build a home for the owners, the way they want. Double hung windows, knotty pine trim, and walls with studs 24" o.c. Builder also recommends a heat pump and the homeowners never look back.
Hey homeowner! If you approach a builder about building a house, please remember one thing. It's your house! Don't let anybody change your mind about what you want. The remodel 5 years down the road costs more than implementing all the things you want the first time around. Istockhouseplans hopes your dream home gets built the way you like the first time around.
Tuesday, April 19, 2011
Designer vs. Homeowner
One day, sitting in the office playing solitaire, we were rudely interrupted by the phone ringing. On the other end is a potential client who absolutely loves one of our plans and would like us to make a few minor modifications. Since they live 15 minutes away, we are willing to take a look. Generally we don't offer this service for out of towners because of the distance gap. Strangely, communication gaps grow exponentially to distance gaps. But being close by means we can meet in person and see the hand gestures that generally accommodate limited similar vocabularies.
We offer to meet the potential client at a local coffee shop, buy them a drink, and go over their ideas.
When we arrive we are hesitantly surprised to meet the client (a couple) and a mother of one of them. Also in attendance is a friend or college roommate, or maybe it was a friend's college roommate. In any event, they are the interior designer.
Things look stickier than raw honey already.
Also in attendance is a 3" notebook that appears to be full of photos, design ideas, and several copies of our plan with different colors of ink all across them. After introductions are made, the first plan comes out.
"We thought about taking this one, removing the windows from the obvious locations, and putting in weirdly sized windows where they don't make sense. Over here, we'd like to remove this entire bearing wall and not have any posts in the way. The idea on this one was to expand the second floor by 800sf without touching the first floor. How much can we cantilever?"
The mother-in-law chimes in about her room. We end up arguing with the interior designer who knows nothing about shear and load-bearing. Finally we say we'll make some adjustments and see how it goes. Everybody leaves pretty sure that the job is not going to happen. We're out about $12.
An open letter to potential homeowners:
Dear potential homeowner;
Thank you for choosing an Istockhouseplans design. We are pleased that we could design a plan that meets your exacting eye for beauty and function. However, if you would like some changes to the plan, we suggest a quiet meeting with just you and us so that we can figure out your basic needs. If we end up spending more time modifying the plan than we did designing and drawing it, you're probably better off having a custom home designed from the start. Please consider a design from scratch that uses one of our plans as inspiration. We tend to be very strict about the homes we design and sell. If your plan ends up being a 3 story neo-modern with a 4 car attached garage, we can recommend a couple of other designers that could help you out. Having us design that style of house is akin to getting a taco at McDonald's. It won't be what you expect and we will struggle to make it happen.
Thank you
Istockhouseplans
Tuesday, April 5, 2011
Designer vs. Builder
"In this corner coming in at a lean 180 pounds and sporting a 3-button mouse is... The Designer! His house plans have sold nationwide but he has a beef so he has called his opponent into the ring."
"And in this corner weighing in at 205 and wielding a framing nailer is... The Builder! He has built houses nationwide and accepts the challenge by the designer."
"Let's get ready to rumble!"
Opponents? Maybe and maybe not. Let's look in a little closer...
Designer: "I very specifically drew out the dimensions for this tipout and you ignored it completely."
Builder: "Are you crazy? Have you ever tried to build something like that? It was too much work."
D: "How will you set this house apart and make it look good?"
B: "I thought that was your job."
D: "I did my job and you ignored it."
B: "Too much time for the payout. Maybe I'll paint the house light brown with dark brown trim."
Designer then tries to whip Builder with the mouse. Builder fires a few nails into the mouse and renders it ineffective. Both contestants leave the ring.
A draw? No, a lack of communication. In our experience we have found that designers and builders rarely (want to) discuss plans beyond the price tag. Those that have discussed plans are usually wanting to strip the house down to a bare square. The designer does the work because he is getting paid, but often against his values because he is being asked to design the wow factor out of the house.
Or perhaps it is a technical issue. The designer specifies to start joist layout at a particular point in order to avoid plumbing issues. The builder spaces evenly from the corner because it's easy and then gets mad at the designer for putting the toilet right there. "But I specified the second joist to be 10" away from the corner, not 16". "That messes up the plywood, besides it's not typical practice."
What to do? How about encourage open discussion? Every plan we sell, we ask the builder if we can discuss some of the points of it and why we did certain things. Sometimes a few bits and pieces are dependent on a single item. If that single item gets changed, the rest of the dynamic crumbles. So we want to alert the builder to such issues. No, not all plans are designed the same. It doesn't matter how many years you've been building.
What would really be ideal is for the builder to invite the designer out the job site. This accomplishes two things. First, the builder better understands what the designer had in mind. Second, the designer gets exposure to the job site and sees and learns how certain elements are put together and how particular builders tend to approach problems. The designer might also be able to suggest an immediate solution if something nosedives. Understandably, the designer should be in the office to conduct business. But if builders can be mobile, why not designers? With a laptop, car charger, and a cell phone, the designer could conduct business from on the road. Camp out at a jobsite for a few days, take orders and process them via wireless, offer solutions with realtime speed. Then off to another jobsite, bouncing around the lower east side for a few weeks before taking some time to support builders on the middle west side. Hit the northern burbs, then the next county, and get a good circuit going. You might even be the next preacher of the Gospel of harmony!
At Istockhouseplans we are happy to offer this service for free. And we know about a lot more than just design. We can help with onsite solutions for energy efficiency and building durability. And as a program ally of Energy Trust of Oregon we can assist with getting your details right to get the biggest incentive possible.
Tuesday, March 22, 2011
Instant Gratification
So you want to build energy efficient, durable, comfortable homes but don't want to commit to a program? Energy Trust of Oregon just released their Best Practices Pocket Guide to the general public. This is a pdf file that outlines many of the strategies that promote energy efficiency. Simple to read, simple to use, and filled with detailed drawings. Print it out and keep it in your back pocket or store it on your i-Device for jobsite reference. This tool is useful for designers, architects, framers, insulators, drywallers, plumbers, electricians, and
Istockhouseplans is an Energy Trust of Oregon approved program ally and has access to all these details and more. If you are looking for an efficient house to be built in Oregon, contact us or look through our catalog. All of our plans sold in Oregon include relevant details to meet Energy Trust's standards.
Get your copy at http://energytrust.org/trade-ally/programs/new-homes/resources/. Scroll down to Best Practice Pocket Guide and click the link.
Energy Trust of Oregon is an independent nonprofit organization dedicated to helping Oregonians benefit from saving energy and tapping renewable resources. Their services, cash incentives and solutions have helped customers of Portland General Electric, Pacific Power, NW Natural and Cascade Natural Gas save nearly $600 million in energy costs. Their work helps keep energy costs as low as possible and builds a sustainable energy future.
Thursday, March 17, 2011
Luck of the Irish...
...Is about the only thing that allowed this post to go out today.
Here's a wee little number that might get your knickers straightened out. Istockhouseplans finally released the flagship of flagships to our stock plan pile. We mentioned a while ago that this monster was coming out and this represents the last of the behemoths. Everything else we release from now on should be around 1500sf or smaller.
The Goose Hollow 3242 is larger than the motherland and comes with a neat twist. Instead of the expected 2,688sf based on dimensions, it comes in at 2,332sf. The footprint is virtually square. But like a doughnut, there's a hole in the middle and it goes clear through. We had this great idea for a courtyard home that would fit on a standard (nay even substandard lots). At 32' wide it could fit in 42' of urban space. Several iterations were tried but most became unwieldly. This time around we took some prior inspiration and mingled it with our holy idea. What results is a large house with 4 bedrooms, 3 baths and lots of conditioned space - plus a neat little outdoor space.
There's not much more to say other than to ask you to check the plan out online. Give us your thoughts on this pierced plan.
Tuesday, March 1, 2011
Can You Spot the Difference?
There are a strain of tiny trailer builders who attempt to create a dwelling that looks very much like a house. Jay Shafer at Tumbleweed Tiny Houses is probably the most famous progenitor of this style. His tiny trailer houses are employed most commonly as travel trailers and ADUs among other uses. So we thought, what would it take to convert one of our full size plans to a travel trailer?

So there's some artistic license and maybe we didn't quite nail it but it was fun to convert one of our 800sf ADUs to an 84sf trailer. Full dimensions are 7x12' with a 6' plate height. Total height is around 11' from the ground to the peak of the roof. 2x3 wall construction allows for a cross-wise elevated bed in the back with a closet or low couch underneath. One wall would contain a small counter and kitchenette. Not quite the same layout as the Tumbleweed XS-House, but also about 21" less in height.
Check Dragonfly Trailers for progress of builds.
Tuesday, February 15, 2011
Timing is Everything
Just last week we laid own our intentions to follow a dream of building tiny trailers. This week came the opportunity to bring the plan to fruition! We entered into the Dockers Wear the Pants Project. We could have a chance to win $100,000 to get our plan off the ground. This would be enough to rent some warehouse space, purchase trailers and materials, and get some rolling stock created. The mind is just swirling with ideas!
Vote for our entry daily at http://apps.facebook.com/dockerswearthepants/entries/14591
Vote for our entry daily at http://apps.facebook.com/dockerswearthepants/entries/14591
Wednesday, February 9, 2011
Century Post!
Congratulations to us for our 100th post. Our first post was in June 2007, 3 years, 7 and one half months ago. At the time we wondered how we might fill up bandwidth with meaningful discussions. Maybe it hasn't been 100% quality but we're still looking for that sweet spot anyway.
So what do we have to say for ourselves? Well first of all receipts have been low. We attribute this to the economy. Second, we have found a groove regarding small homes and intend to stick with it. We have one more large home design that is almost done. We will release that beast and then focus most of our drafting efforts towards 1500sf homes and under. All the charm with 1/3 less fat. And finally we have decided to branch out and use our hands for additional uses.
With T-squares in one hand and hammers in the other, we will begin designing and building tiny travel trailers for sale. We have become so obsessed with tiny living spaces that we just have to try some out. Possibilities include vardos, teardrops, canned hams, etc. Maximum size is about 7'x12'. We considered mimicking Tumbleweed Tiny Homes but want less house-y looking for now. We want you to be able to tow one of these behind your station wagon and park it in the garage, not have it sitting on a parking pad behind your F-350.
The goal is to begin building by March 1st and have it ready for camping by June 1st. We'll post updates as we go so that the tiny travel trailer community can share in whatever ideas we have to offer. If you are interested in being the owner of our first 4'x8' ledge vardo prototype, contact us and we'll customize it for you. Amenities include sleeping for 2, tiny pullout table, 12V wiring and stationary 120V hookup, and fully insulated to R-10. We plan on a craftsman sort of aesthetic but if you get in early enough you can have a say in paint colors or take delivery (and a price reduction) of a primed trailer ready for your artistic eye.
Happy trailers and here's hoping we get hitched soon!
Tuesday, January 25, 2011
Making Decisions Under Pressure
In our last major post we discussed how improperly sized and installed HVAC equipment can result in a quicker failure than normal. We left you hanging with the question of how to equalize the pressure in your rooms so that they don't turn into a big wood and gypsum balloon. If you recall:
In order to equalize the air pressure, we need the same amount of air going out of a room as is coming in. The idea is that warm enters a room and forces the cooler air out which goes to the furnace, gets warmed, and the cycle goes again. If air is to leave a room, we need a space for it to happen. There are four common ways to make this happen.
1. Door undercuts have been discussed. These are generally not aesthetically pleasing.
2. High/low relief vents. This entails cutting a hole high up in the wall of the room between studs. Between the same studs a hole is cut near the floor in a hallway or other common area. This allows air pressure to move freely. Grills over both cuts give a more expected appearance. This approach may not give complete privacy as sound can travel a little between both spaces.
3. Jumper ducts in the ceiling. These are leftover pieces of flex duct used to create a connection between bedroom and hallway in the ceiling. It is similar to the high/low vent but less obtrusive and slightly more private.
4. Dedicated return. This is a connection in the ceiling of a room right into the main return for the furnace. This allows for the most direct air balancing and the most privacy. Depending on the distance to the furnace it may be noisy. Further is better.
Bear in mind that these measures are only necessary in larger rooms that can be closed off from the main living area. Smaller bedrooms and bathrooms don't gain enough positive pressure. Great rooms and dining rooms are generally connected to the majority of the living area. A media room or bonus room that is separated by a door and has more than one supply may benefit.
If you want to give it a down and dirty test, close all doors in the house and fire up the blower. Then slowly open each door. If it presents any resistance then some sort of relief is needed. If you want to be even more savvy, get hold of a Duct Blaster and someone who can run one. This will give you an accurate test of where your problems will be. Then whip out your slide rule and estimate a size for pressure relief.
If your house is especially tight, you will definitely want to install a heat recovery ventilator. This system brings fresh outside air into the furnace while tempering it with the heat from outgoing stale air. In some cases this can be your blower with an in-line heat source providing comfort.
Istockhouseplans recommends doing away with ducted systems altogether. For better comfort consider a ductless heat pump, radiant floor heat, or electric soft heat. Or do away with heat sources completely and join the PassivHaus movement.
- More air goes into a master suite than out;
- This is a result of no escape paths;
- Air backs up into the furnace;
- The furnace gives up and dies during a cold snap.
In order to equalize the air pressure, we need the same amount of air going out of a room as is coming in. The idea is that warm enters a room and forces the cooler air out which goes to the furnace, gets warmed, and the cycle goes again. If air is to leave a room, we need a space for it to happen. There are four common ways to make this happen.
1. Door undercuts have been discussed. These are generally not aesthetically pleasing.
2. High/low relief vents. This entails cutting a hole high up in the wall of the room between studs. Between the same studs a hole is cut near the floor in a hallway or other common area. This allows air pressure to move freely. Grills over both cuts give a more expected appearance. This approach may not give complete privacy as sound can travel a little between both spaces.
3. Jumper ducts in the ceiling. These are leftover pieces of flex duct used to create a connection between bedroom and hallway in the ceiling. It is similar to the high/low vent but less obtrusive and slightly more private.
4. Dedicated return. This is a connection in the ceiling of a room right into the main return for the furnace. This allows for the most direct air balancing and the most privacy. Depending on the distance to the furnace it may be noisy. Further is better.
Bear in mind that these measures are only necessary in larger rooms that can be closed off from the main living area. Smaller bedrooms and bathrooms don't gain enough positive pressure. Great rooms and dining rooms are generally connected to the majority of the living area. A media room or bonus room that is separated by a door and has more than one supply may benefit.
If you want to give it a down and dirty test, close all doors in the house and fire up the blower. Then slowly open each door. If it presents any resistance then some sort of relief is needed. If you want to be even more savvy, get hold of a Duct Blaster and someone who can run one. This will give you an accurate test of where your problems will be. Then whip out your slide rule and estimate a size for pressure relief.
If your house is especially tight, you will definitely want to install a heat recovery ventilator. This system brings fresh outside air into the furnace while tempering it with the heat from outgoing stale air. In some cases this can be your blower with an in-line heat source providing comfort.
Istockhouseplans recommends doing away with ducted systems altogether. For better comfort consider a ductless heat pump, radiant floor heat, or electric soft heat. Or do away with heat sources completely and join the PassivHaus movement.
Tuesday, January 11, 2011
Lengthy Topic
Today's little bonus post is brought to you by the American Wood Council and their span calculator at
http://www.awc.org/
Don't get to excited, this is not a full structural calculator. It is, however, a great alternative to checking span tables and they have an iPhone version, handy for field specification. Mind the deflection.
Happy designing,
Istockhouseplans
http://www.awc.org/
Don't get to excited, this is not a full structural calculator. It is, however, a great alternative to checking span tables and they have an iPhone version, handy for field specification. Mind the deflection.
Happy designing,
Istockhouseplans
Tuesday, January 4, 2011
Does your equipment blow or suck?
Happy twenty-'leven from Istockhouseplans to all of our friends out there in cyberland. We hope your holiday was interesting and thoughtful. A quick note about our year-end report: despite the down economy, our books show that we made twice as much in 2010 as we did in 2009. Thanks to everyone who made that possible, and here's a toast to all of you that your books did and will do the same for 2011.
Now, to the topic at hand. A strange thing happened over the holidays. The building that we work from is heated with a forced air gas system, commonly known as a gas furnace. It was recently insulated and air-sealed. Somebody kicked a heat register shut and the tighter house acted differently. In this case something happened. Before, nothing would have happened. This lead us to a little investigation.
First off, a house is a closed system but not entirely. It is impacted by the outside environment to some degree. The more a house is insulated and air-sealed, the more you reduce the impact from and to the outside environment. This means you get more reaction within the house when something changes. What changed in this case was air pressure. By shutting a heat register, suddenly more blown air is directed to other registers. In a tight house, this air is supposed to balance by going into the return register, through the furnace where it is warmed, and back through the registers.
Now imagine that air that is blown into a bedroom can't return to the furnace. That is, it is blown in but there is no way for it to get out. This might be the case where there is carpet and the door is shut leaving a paper-thin space between the bottom of the door and the floor. A little air will get out but now the system will be imbalanced. Kind of like filling a balloon. More air goes in, but none comes out.
But the air has to go somewhere. With a balloon, it will stretch the environment. Unfortunately drywall is not as pliable as rubber. So the air goes where it can, that is through tiny cracks. At some point the room reaches critical mass for pressure. This is when things start to happen.
Much like a pipe that has been corked off, the air stops flowing through the duct. It might back up and force more air through another register up or down the line. If it is a dedicated duct run with no other outlets, it will back up into the furnace. So what you have is two pressurized environments doing battle. Try this: grab a straw and a loved one. Each of you put one end of the straw in your mouths. Now both blow as hard as you can. Cheeks will turn red, eyes will bulge, and finally someone will get a mouthful of the other one's air. This is called system failure.
In the case of your furnace you could simply blow a duct. However with today's tighter duct runs, the weak spot becomes the furnace, most notably the blower fan. So the fan has back pressure causing two forces to exert their will upon it. At some point the fan gives in and stops blowing. The furnace still warms but the forced-air part has been taken out of the equation. This tends to happen on the coldest day of the year on a Saturday night.
Granted, one single room is probably not going to have major adverse effects on the HVAC system. But imagine an 1800sf three bedroom house. The furnace is likely to be oversized (60kBtu) and the master bedroom might have two heat registers due to it's size (~200sf) as well as a heat register in the master bath and maybe one in the master closet. The door is closed and there is no appropriate 1" undercut. In fact, you would need about a 4" undercut. Air gets backed up in the room. Your head hurts. Then the furnace quits. You thought it was just the end of the cycle but it doesn't turn back on and the temperature continues to drop. At first you assume a power outage but the VCR clock is still blinking '12:00'. The next day it's even colder in the house so you call the HVAC tech. He says he'll be out there sometime between 9a and Friday.
The bugger is that your house was built last year.
Before buying a new house, ask if the system was properly sized. There are a slew of manuals and related software out there for professionals to use. As a builder, always ask your HVAC tech how they arrived at the necessity to install an 80kBtu furnace. Also ask how they are going to mitigate zonal pressure relief. If they stare at you or stutter or write it off, hire someone else.
In the meantime, Istockhouseplans recommends not using forced air systems. We push for hydronic floor heat, so called 'soft' heat (electric baseboard) and mini-split heat pumps. All of these systems take less space and use less or no air. They can also be sized more appropriately than a furnace can.
Don't forget to check your filters and consider cleaning your ductwork. Oh, and if your head hurts in your bedroom, simply try opening the door. Stay tuned for next time when we'll look at some more zonal pressure relief options.
Subscribe to:
Posts (Atom)


