
The APA (those wood people again) have issued a report on raised heel (AKA energy) trusses. Typical trusses do not allow full height insulation out to the outside edge of an outside wall. This means that the thermal envelope of your house is compromised where the roof comes down to the wall. This would be akin to the back of your neck where your coat doesn't quite reach up to nor does your wool hat reach down to. So consider raised heel trusses to be a scarf for your home.
Builders harumph about several issues. Mainly plywood and siding and the extra cost. How much extra cost, Captain Pennypincher? Yes, it does cost extra. But could you perhaps use all those drops from your sheathing in that extra 8-12" space? But the taller blocking is also a somewhat valid point
The report gives some simplified methods for securing the trusses without complicated blocking. The report is applicable for trusses with a heel between 15-1/4" and 24"; using continuous plywood (CS) as a prescriptive shear bracing method; for homes in seismic zones A, B, and C; for homes with wind exposure of 110mph or less; a whole list of other fairly typical conditions.
In essence, plywood has been found to be adequate to replace blocking between the tall trusses for all but the top chord itself. That is, rather than using stacked 2x12's (illegal anyway) or a truss company built blocking solution, the plywood can extend to the bottom edge of the top chord. Typical 2x4 bird-blocking can be used on top of that.
Thankfully, you as a builder do not have to figure this all out. Talk to your designer about simplified solutions for energy heel trusses. Here at Istockhouseplans, we're always happy to help you get the most bang out of your buck.
See the full report here (an account or login may be required):
http://www.apawood.org/level_c.cfm?content=pub_searchresults&pK=Form%20SR-103&pF=Yes
Showing posts with label energy efficiency. Show all posts
Showing posts with label energy efficiency. Show all posts
Tuesday, April 29, 2014
Tuesday, June 18, 2013
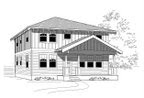
Garage to ADU Conversion Problems
When doing math it sometimes gets tricky in the conversions. How many litres in a pint? How many centipedes in a decibel? Likewise it can get tricky converting a garage to an ADU. Let's pretend that your local jurisdiction is not an issue and look at the inherent problems. (Note, please always consult with your local jurisdiction and get a permit where required.)
The first issue would be the floor. Most contractors would be happy to leave the floor as a slab and call it good. Maybe put a carpet over it. Nothing could be worse. You have no idea what's under that slab. It could be sand, gravel, or bare dirt. There may or may not be a vapor barrier under there either. Concrete is nothing more than a rigid sponge. Placing a carpet over the top just gives latent moisture somewhere to make dank and moldy. Don't do it.
Instead, consider laying some 6 mil vapor barrier down over the slab first. There is likely no insulation under there either so a few inches of rigid foam insulation would help to keep the dewpoint away from your materials that are susceptible to mold. After making sure all joints are sealed, overlay with a floating wood floor. Looks nice too.
Hopefully walls and ceilings would be straightforward. Always check for and mitigate any moisture in the walls, make sure the wiring is correct, and get inspected if necessary before applying sheetrock. Fill the space with insulation before making it inaccessible.
Another big issue to consider is the street appeal. The general rule of thumb is to throw some sort of window into the former garage door opening and frame around it. This looks wrong on several levels. First, the garage door header is generally not equal to other windows or doors. If the garage is freestanding then this is less of an issue. But if the garage door is near other windows and doors it can look discontinuous.
The expensive option is to cut out the header and make it the same as other headers on the front of the house. Another option would be to consider something such as two 3/0x5/0 single hung windows. The vertical aesthetic of the windows can help soften the horizontal issue. Another option which happened near here was to remove the garage door but build an inside wall that looks like a garage door from the outside. Windows were already on the side of the garage. This looked really nice. Unfortunately the local jurisdiction in all their wisdom required a window in the front. In vulgar terms it looks really dorky now. Perhaps a sliding glass door could be considered as another option.
Another issue that can come up is the parking space. If you have less than 16' in front of your garage to begin with you may lose an onsite parking space. Some jurisdictions might think this a big deal. Others won't. A driveway going up to a blank wall does not fool the eye. We have grown to expect a garage door at the end. If that garage door is gone then the driveway needs to be reimagined in order for the eye to accept a wall at the end.
If there is room then landscaping or a bench will help soften the transition. The amount of concrete in the driveway could also be reduced. Leave a couple of 30" strips with 24" between them. Everything else should be returned to grass or other low, resilient plantings. If your budget allows, put in driveable molds or spaced pavers that allow grass to grow in between them. Some folks may not appreciate the look of parking a car in grass but it may suit others' needs.
If you are converting a garage into an ADU, Istockhouseplans would be pleased to give advice. Send us an email or leave a comment below.
 |
| Looks normal but the owners want more living space |
The first issue would be the floor. Most contractors would be happy to leave the floor as a slab and call it good. Maybe put a carpet over it. Nothing could be worse. You have no idea what's under that slab. It could be sand, gravel, or bare dirt. There may or may not be a vapor barrier under there either. Concrete is nothing more than a rigid sponge. Placing a carpet over the top just gives latent moisture somewhere to make dank and moldy. Don't do it.
Instead, consider laying some 6 mil vapor barrier down over the slab first. There is likely no insulation under there either so a few inches of rigid foam insulation would help to keep the dewpoint away from your materials that are susceptible to mold. After making sure all joints are sealed, overlay with a floating wood floor. Looks nice too.
Hopefully walls and ceilings would be straightforward. Always check for and mitigate any moisture in the walls, make sure the wiring is correct, and get inspected if necessary before applying sheetrock. Fill the space with insulation before making it inaccessible.
Another big issue to consider is the street appeal. The general rule of thumb is to throw some sort of window into the former garage door opening and frame around it. This looks wrong on several levels. First, the garage door header is generally not equal to other windows or doors. If the garage is freestanding then this is less of an issue. But if the garage door is near other windows and doors it can look discontinuous.
 |
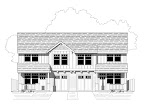
| Slap in a window. Well, it's functional at least. Yeesh. |
The expensive option is to cut out the header and make it the same as other headers on the front of the house. Another option would be to consider something such as two 3/0x5/0 single hung windows. The vertical aesthetic of the windows can help soften the horizontal issue. Another option which happened near here was to remove the garage door but build an inside wall that looks like a garage door from the outside. Windows were already on the side of the garage. This looked really nice. Unfortunately the local jurisdiction in all their wisdom required a window in the front. In vulgar terms it looks really dorky now. Perhaps a sliding glass door could be considered as another option.
 |
| This looks a little more purposeful... |
 |
| A cabin perhaps? May or may not work. |
Another issue that can come up is the parking space. If you have less than 16' in front of your garage to begin with you may lose an onsite parking space. Some jurisdictions might think this a big deal. Others won't. A driveway going up to a blank wall does not fool the eye. We have grown to expect a garage door at the end. If that garage door is gone then the driveway needs to be reimagined in order for the eye to accept a wall at the end.
If there is room then landscaping or a bench will help soften the transition. The amount of concrete in the driveway could also be reduced. Leave a couple of 30" strips with 24" between them. Everything else should be returned to grass or other low, resilient plantings. If your budget allows, put in driveable molds or spaced pavers that allow grass to grow in between them. Some folks may not appreciate the look of parking a car in grass but it may suit others' needs.
 |
| Sweet Stickley, can we live here? That bay, that driveway. What lovely lines! |
If you are converting a garage into an ADU, Istockhouseplans would be pleased to give advice. Send us an email or leave a comment below.
Tuesday, May 28, 2013
Accessing Your Nether Regions
If you build on a crawl space type of foundation then you're going to be required to provide access to that space for future maintenance and dead opposum removal. Most crawl spaces are required to have a minimum clearance of 18" from grade to the bottom of the framing members. This is not exactly a pleasant distance to crawl around in but it is at least workable.
What's in your crawl space? Well not much. But there is access to plumbing, mechanical (if you don't care about energy efficiency), and some electrical. There's also dirt, dust, spiders and possibly dead animals. Maybe there's a drain down there. It's possible to go years and years without ever having to go down there. But at some point a visit may be required.
Let's say your waste drain springs a leak. The waste drain doesn't exactly have crystal clear water in it. This will require a technician to crawl down into the space with tools and equipment to fix the problem and remove any extras that shouldn't be under your house. They likely will be up and down several times. So where is the most likely spot for the crawl access to be?
Believe it or not we often see other designers and architects place this crucial portal in the master bedroom closet.
Really? Can you see the disgust on our faces?
Not only that but apparently this practice is so ingrained in some designers (and builders even) that they will place the access here regardless of convenience. If the carpeted master closet is in the far corner of the house this means that dirty nasty crawl space detritus will be making it's way through most of the house starting with your wife's blouses.
We at Istockhouseplans believe that there is a better option. Our first choice is to place the access in a hall closet preferably where the floor is hardwood. However an even better choice would be to place the access outside of the house completely. In some parts of the country this is more common than others. Placing the crawl access on the outside of the foundation has several advantages:
- Dirty crawl space objects will never enter your house
- The repairman won't have to worry about your wife's clean white laundry
- Most important, the crawl space hatch can't leak warm air out of your house
Tuesday, September 25, 2012
Energy Star
Another month of silence. Hmm... too much work?
There are a few new stock plans in the hopper that need to be finished, many ideas that need to be started but the amount of custom work we've been receiving has been incredible. We've designed plans across the board for clients who come to us because of word of mouth. It's all been about who we know.
And recently we were approached by Energy Star to draw energy efficient home design details for their upcoming release. Once those are done and released to the public we'll direct you to the new details. For those home designers that follow this blog, we hope those details will be useful in your designs.
Maybe once people stop bugging us for custom work we'll get on those stock plans, eh?
Tuesday, March 6, 2012
What NOT to do
Due to mounting pressures in other arenas, last week's blog post missed the mark. But we are prepared this week to offer a small round of funnies. Please always background check your contractor and make yourself aware of energy efficiency practices.


We are particularly fond of the fixed R-21 door:


We are particularly fond of the fixed R-21 door:
Tuesday, January 3, 2012
Water Heater Update
Back in December of '09 we reviewed a couple of water heaters that we thought were pretty stylish. The American Council for an Energy Efficient Economy (ACEEE) has created a chart which looks at operating efficiencies and lifetime costs for nine different types of water heaters. We promoted two types of water heaters, one being the high-eff. electric storage, the other being a heat-pump water heater (HPWH). We were impressed by both. The ACEEE study shows the HPWH to be the most efficient unit as well as having the lowest lifetime operating cost. (N.B. that ACEEE lists $190 as annual operating cost while Ruud lists their unit as costing $234 per year. Comparisons made with the average of $212/yr). In fact, compared to a standard electric water heater, the HPWH has a payback period of a little over three and a half years. Even the high-eff. electric has a 3 year payback period over the standard electric tank. After that, though, the HPWH will be ten times cheaper to operate than the high-eff. over the standard electric tank. (Payback period calculated by taking difference of installed costs and dividing by the difference in yearly energy costs.)
Note that if you currently use an oil-fired boiler, you almost can't afford to NOT switch to a new water heater. Even a minimum efficiency electric heater will have a 4 year payback period. If gas is available in your area and you prefer it in case of an electric outage, payback period is about 3 years for a conventional gas heater. Even a HPWH will pay back in 4 years. (Payback period calculated by taking installed cost and dividing by the difference in yearly energy costs.)
Of note is that some state and federal tax credits will offset the cost of a high-efficiency water heater even further making your payback almost immediate. The federal 30% tax credit for energy efficient improvements brings the payback period of a HPWH to less than two years (20 months) compared to a standard electric tank heater.
Istockhouseplans doesn't always designate a space for a water heater within the house (and attached garages in our designs are rare). Therefore we are pleased to see that the HPWH is a high contender for cost and efficiency. These types of units can be put in crawlspaces, basements, and even outside in a milder climate. For colder climates a little attached shed on the side or back of the house would suffice fine. As always, check with your local codes, etc, etc.
Tuesday, December 20, 2011
Heat Load Calculator
A while back we posted a series on the mechanics of calculating the heat load of your home. At the end we promised to offer up an Excel file that is set up for you to do your own calculations without getting a headache or hand cramp
The calculator comes pre-filled with info from our Houston 2448. Everything in light yellow can be modified. The file or the rest of the cells are not locked. This should be considered open-source, AKA modify at your own risk. If you enter any values into white cells, you may destroy formulas. There are also no fail safes or error checking in here. Double check your work.
There are 7 components listed: slab, floor, walls above and below grade, windows, doors, and roof. Each of these has inputs for area and R-value. Note that windows should be input as U-value. When inputting wall area, don't take windows or doors into account. They are automatically deducted from the wall area in the calculations. Outside design temperature can be modified for the first four items; remaining values are derived from those.
All the work is shown on the following columns. The UA value, Δt and Btu/hr values are shown. Indoor temp can be changed to your desired setpoint. To the right is a little table with all sorts of nerdy calculations in it. Percent of load tells you which component is losing the most heat. Cost/hr tells you how much it costs. In the example you can see that more than half the heat loss in this house is through the walls. Of course! There is only R-15 in the walls! You can also see that increasing to R-21 doesn't do much for that factor. Increase the walls to R-30 and you can get that component down to about 1/3 of the heat load. Still high. Note that the rest of the load percentages change as you change the area or R-value of an item.
Lower down on the page is a place to take leakiness of the house into account. Input your target or measured ACH50 as well as volume of the home. You should only change the HC if you know what you're doing.
The final input is for number of bedrooms or potential bedrooms. This little calc will determine internal gains from humans. It takes the number of bedrooms and adds 1 person per ASHRAE standards. If there will only be two people living in your 3000sf house, enter one bedroom for kicks.
Total peak heating load is given near the bottom of the sheet. The final table gives an idea of how much of what types of heat is needed to keep the house comfortable. A forced air unit size and efficiency can be entered. As you can see, even this is WAY too big for the house. Even 2 1kW cadet heaters will do fine. In this case we would recommend a 500W heater in each of the bedrooms and bathrooms with a 1kW in the great room. Still a bit much but at least reasonable. Perhaps a mini-split heat pump would do for efficiency as well as adding some cooling if you are in the South.
This calculator should be used for entertainment purposes only. No guarantees about the results or performance of this tool are made or implied. If you break it, you bought it. If you find errors, please feel free to let us know. If somebody who knows javascript is bored, we would be thrilled to turn this into an online tool.
Tuesday, December 6, 2011
Energy Efficient Wall Systems
You may remember our post a couple of years ago promoting Fat Walls. In their 11/11 monthly newsletter, Energy Design Update recently reported on 15 different wall assemblies modeled through TRNSYS software. The walls were simulated in the climates typical to Atlanta, Pittsburgh, and Phoenix. Of the 15 walls, three tied in first place for an overall value of R-43. One of these walls fills a 2x6 cavity with closed cell polyurethane spray foam for a rather high price tag. The second wall involves 10" thick SIPS. The third wall is our option number four from the previously mentioned post with 2" more of foam. That is, a 2x6 wall with blow-in and 4" of outboard XPS foam. As we mentioned back when we wrote the initial post, this makes window detailing a bit of a bear. Attachment issues come into play as well. The advantage of this system is the standard wall framing and no loss of floor space inside the house.
A reasonable compromise might be 3" of foam. This allows the use of true 2x4 for bucking out windows while allowing 1/2" air space. Half inch furring strips can then be used over the foam for attachment as well as a rainscreen.
They also modeled a similar wall as our top choice, double 2x4, total 8" thick with 2" of outboard foam. Our results? R-40 with U-0.20 windows. Their results were R-38 with U-0.25 windows. As you should know, U-0.20 windows are slightly better than U-0.25 resulting in a slightly higher total wall R-value.
So apparently we know what we're doing!
Tuesday, October 25, 2011
Calculating Even More Heat Load
Welcome back to the third and final installment of calculating heat load. In Part I we looked at the envelope of the home. In Part II we looked at air infiltration and how it works. In this part we will look at internal loads and finally deciding what heat source to add to a home.
We realized that we should have been giving a real world example from the start. In light of that, let's do some quick review using our plan The Belmont #3232. If you recall the equations:
For air infiltration, recall the formula ΔT x ACHnat x Volume x HC = BTU/hr. Our ΔT=45°F, volume is 18432 (32x32x18), HC = 0.022, and we'll assume ACHnat to be based off of a blower door test of 5.0ACH, ergo .25.
Now for the good news! You will have several internal loads that will help to heat your house, that is, they will make this number smaller. The biggest source is the occupants. General convention assumes that there will be 2 people in the master bedroom and one person for each of the other bedrooms. The Belmont is a 4 bedroom home but practically we could assume four occupants living upstairs. Occupants put out anywhere from 200 to 300 btu/hr of heat load. We are preferential towards 275 btu/hr. For four people, this is a reduction of 1100 btu/hr. You can also figure in incandescent lights, the kitchen oven, hair dryers and other such pieces. These don't make a huge difference unless your heat load is so low that you are in PassivHaus range.
Our final result for heating this home in this scenario is 14861.52 btu/hr. Now what? Now we need a heat source. Our first choice might be the typical forced air gas furnace. A quick look at manufacturer catalogs will reveal that 40,000 btu/hr is the smallest one available. Even at a low 90% efficiency this will put out 36,000 btu/hr. But if you have an attached garage, you can always place the furnace there and lose about 40% of your heat bringing the load down to about 25,700 btu/hr. Let's not.
Another option might be electric wall heaters. Each 1kW wall heater = 3412 btu/hr. This calculates to needing 5 heaters. Reviewing this plan shows that there are up to 10 rooms that would need heat. Perhaps several 500W units would be more applicable. Don't forget to install them on an interior wall.
Another choice is a ductless heat pump. You are limited to a max of 4 heads per unit. More heads requires another unit which doubles the price. Or you could get a splitter for some of the heads and share the heat load between rooms. To outfit the Belmont 3232 you would need one head for the dining/parlor, one split head for the office/bath, another for the master and bath, one more for the auxiliary bedrooms. The kitchen, utility room and bathroom would need a 500W electric heat source.
Another option might be radiant heat. In floor hydronic heat puts out 18-25 btu/sf. Assuming 20btu, you could cover 743sf of the floor with tubing. But how do you cover 743sf in a 2000sf house? If you stick to just the walk areas you could make it happen. But unless you are doing an onsite DIY approach, this option can be super expensive.
The final choice would be to increase some insulation in the walls, try for better windows (U-0.025 is reasonable) and tighten the home to 2.0 ACH or less. Resulting calculations reduces to 10519 btu/hr. Then install an HRV in the utility room to cycle fresh air and attach a small heating unit to it.
Any other ideas?
In the very near future we'll refine our simple spreadsheet calculator and make it available for your use. The calculator does most of the math for you but we made this guide available so you'd know what's going on in the background. Happy calculating!
We realized that we should have been giving a real world example from the start. In light of that, let's do some quick review using our plan The Belmont #3232. If you recall the equations:
- Afloor x Ufloor x ΔTfloor = Btu/hr floor
- Awall x Uwall x ΔTwall = Btu/hr wall
- Aceil x Uceil x ΔTceil = Btu/hr ceil
- Awindows x Uwindows x ΔTwindows = Btu/hr windows
- Adoor x Udoor x ΔTdoor = Btu/hr door
- Floors: (32x32) x (1/38) x 25°F = 673.68 (1024sf insulated floor, R-38 in joists)
- Walls: (32x18x4 - 339.33) x (1/21*.8) x 45°F = 5262.51 (four walls minus windows, 32'L x 18'H, R-21 with framing factor)
- Ceiling: (32x32) x (1/49*.8) x 25°F = 522.45 (1024sf ceiling, R-49 with framing factor due to edge pinch)
- Windows: 339.33 x 0.30 x 45°F = 4580.96
- Doors: 40 x 0.20 x 45°F = 360
For air infiltration, recall the formula ΔT x ACHnat x Volume x HC = BTU/hr. Our ΔT=45°F, volume is 18432 (32x32x18), HC = 0.022, and we'll assume ACHnat to be based off of a blower door test of 5.0ACH, ergo .25.
- 45°F x .25 x 18432 x 0.022 = 4561.92
Now for the good news! You will have several internal loads that will help to heat your house, that is, they will make this number smaller. The biggest source is the occupants. General convention assumes that there will be 2 people in the master bedroom and one person for each of the other bedrooms. The Belmont is a 4 bedroom home but practically we could assume four occupants living upstairs. Occupants put out anywhere from 200 to 300 btu/hr of heat load. We are preferential towards 275 btu/hr. For four people, this is a reduction of 1100 btu/hr. You can also figure in incandescent lights, the kitchen oven, hair dryers and other such pieces. These don't make a huge difference unless your heat load is so low that you are in PassivHaus range.
Our final result for heating this home in this scenario is 14861.52 btu/hr. Now what? Now we need a heat source. Our first choice might be the typical forced air gas furnace. A quick look at manufacturer catalogs will reveal that 40,000 btu/hr is the smallest one available. Even at a low 90% efficiency this will put out 36,000 btu/hr. But if you have an attached garage, you can always place the furnace there and lose about 40% of your heat bringing the load down to about 25,700 btu/hr. Let's not.
Another option might be electric wall heaters. Each 1kW wall heater = 3412 btu/hr. This calculates to needing 5 heaters. Reviewing this plan shows that there are up to 10 rooms that would need heat. Perhaps several 500W units would be more applicable. Don't forget to install them on an interior wall.
Another choice is a ductless heat pump. You are limited to a max of 4 heads per unit. More heads requires another unit which doubles the price. Or you could get a splitter for some of the heads and share the heat load between rooms. To outfit the Belmont 3232 you would need one head for the dining/parlor, one split head for the office/bath, another for the master and bath, one more for the auxiliary bedrooms. The kitchen, utility room and bathroom would need a 500W electric heat source.
Another option might be radiant heat. In floor hydronic heat puts out 18-25 btu/sf. Assuming 20btu, you could cover 743sf of the floor with tubing. But how do you cover 743sf in a 2000sf house? If you stick to just the walk areas you could make it happen. But unless you are doing an onsite DIY approach, this option can be super expensive.
The final choice would be to increase some insulation in the walls, try for better windows (U-0.025 is reasonable) and tighten the home to 2.0 ACH or less. Resulting calculations reduces to 10519 btu/hr. Then install an HRV in the utility room to cycle fresh air and attach a small heating unit to it.
Any other ideas?
In the very near future we'll refine our simple spreadsheet calculator and make it available for your use. The calculator does most of the math for you but we made this guide available so you'd know what's going on in the background. Happy calculating!
Tuesday, October 18, 2011
Calculating More Heat Load
Last week we looked at how to calculate your heat load based on the envelope of your home. This week we'll take a look at air infiltration and the effect it can have on your home. The caveat should be given that the tighter you make your home, the more you should be concerned about vapor barriers, retarders, and other management. Indoor air quality also becomes a concern. We won't address these issues in this post.
Air infiltration is not something that can be assumed or calculated. Just as a nail can't be driven by estimation, it needs a tool. The most common tool used is a blower door. This is a device that attaches into your front door frame and accepts a large industrial fan. After closing all other doors and windows, the fan is turned on (generally pointing out) until it is removing 50 cubic feet per minute (CFM) from your home. Some places in the world aim for 25 CFM. For a visual, imagine 4 regulation basketballs. This is 1 cubic foot. So turning the blower door on to 50 CFM means that you are throwing 200 basketballs out your front door every minute (or more than 3 every second!)
Why in the world would you do this? A couple of reasons. First, this is a great opportunity to walk around your house with a smoke stick and see where air is leaking in. These are places that need to be plugged. Get your caulk, foam, whatever and fill it up.
Second, since there is diagnostic equipment hooked to the blower door, a technician can determine how much air will blow through your home on a windy day. The result is a standardized answer that can be used for comparison. Generally it is in the range of 0-20 air changes per hour (ACH). This means that with the blower door running, the volume of air in your home could be changed out 20 times an hour. Every 3 minutes you're getting new air. This air is coming from outside, the attic, the crawlspace, and the attached garage.
Most newer homes fall around 6 ACH50. Older homes will be much higher. It takes some determination to lower a new home from 6 ACH50. No one accidentally builds a tight home. With some simple effort we have seen homes approach 4 ACH50. A bit more effort and change in building methods results in 2 ACH50 which is very good. The lowest we've ever seen is 0.22 ACH50. This was a home built to PassivHaus standards.
So why does this matter for energy calculations? Warm air can be blown out of your home and replaced with cool winter air through leaks. We need to calculate for this for the furnace to be able to keep up. Otherwise your home will get cooler and cooler until it equalizes with the outdoors. This could occur with a 3000sf leaky home and a 40kBTU furnace. Bad news.
Less talking, more computing. This is one single formula that has a lot of lead up. There are four numbers in the formula. The first is our friend ΔT. The second is the result of your blower door test in ACH50. We need natural ACH so divide by 20. The third is the volume of your heated area. The fourth is the convective heat transfer co-efficient (HC). This number has a general range around 0.018 to 0.022:
ΔT x ACHnat x Volume x HC = BTU/hr
Example: A 1500sf house has a blower door result of 3.5ACH50. Assume HC to be 0.022 (Marine Cold). What is the heat loss through infiltration?
Answer: ΔT from last week is still 45°F. ACHnat = ACH50/20 which is 3.5/20 = 0.175. Volume is approximately 1500sf x 9' (ceilings) = 13500cf. HC is stated. So the formula is 45 x 0.175 x 13500 x 0.022 = 2339 BTU/hr. Note that we gave a tightness that is half of typical. Were it 7 ACH50 this load would double! Don't think air tightness matters? It's the biggest factor in heat load.
Add this to your envelope load and come back next week for part three, Interior Loads!
Tuesday, October 11, 2011
Calculating Heat Load
How many times have you looked at a house plan or a house and wondered how much heat it was going to use per year, or need at peak times? There are several good programs out there that will allow you to do this with a few mouse clicks. Maybe you don't have access to such a program and want to make an educated guess. There are several simple calculations that you can do to figure out the answer.
What we are figuring out is the amount of heat that is lost from the house in several ways. One way is by conduction through the envelope. Another way is by convection through leaks in the house. Most factors are known but several need to be looked up. Once you know those values for your area, you can use them again and again.
Let's establish those values. First you will need to establish your highest desired indoor temperature. During winter this might be 62°F or 65°F or 68°F. We'll use 65°F for this guide. Next you'll want to establish the coldest outdoor temperature that might be experienced. For the walls this might be 20°F or 0°F or -20°F if you're in Alaska. We'll assume 20°F for this guide.
Beware however that your crawlspace and attic will have different cold temperatures. If your insulation is in the ceiling plane instead of the roof plane, your attic will enjoy the comfort of being enclosed even though it won't be insulated. Therefore in 20°F weather the attic may register at 40°F. The same situation is present in the crawl space, especially if it's vented and any walls adjacent to a garage. We'll use 40°F for these three locations.
Using these temperatures establish a difference of temperature known as ΔT (delta-T). This is simply subtracting the coldest outside temperature from the desired indoor temperature. Using our established values the walls, windows, and exterior doors will have a ΔT of 45°F and the crawl space and attic will have a ΔT of 25°F.
Next you'll need to gather the areas of each of the parts of your building envelope. This includes floors, walls, ceilings, windows, and doors. Rather than figure the exact wall area, imagine there are no windows or doors. Then when you do the window and door areas, you can subtract them from the wall area to get a more accurate reading with less calculation. If you want to be especially precise, you can note the amount of wall against the garage, second floor walls against first floor attics, etc. We'll skip that precision.
The other thing you'll need to gather is the U-value of those components. U-value is the inverse of R-value. U-value should also take into account the whole assembly and not just the insulation itself. An R-21 batt does not equal an R-21 wall. A typical R-21 wall will end up at about R-16, that is, a U-value of 1/16 or .0625. A simple true R-value conversion can be had by multiplying your insulation R-value by a factor depending on quality. For a standard average build, assume 75% of your insulation value. For good construction (24" o.c. R-30 wall for example) assume 80%. If you're using exterior foam, figure your percentage value and then add the foam. For instance, an average R-21 wall works out to about R-16 but adding 1-1/2" of XPS foam adds R-7.5 for a total of R-23.5, U-value of .0426. More precision is better but don't go crazy.
Let's put it all together:
The general equation for each element is area x u-value x ΔT. You should write down the following:
Next week: Infiltration!
What we are figuring out is the amount of heat that is lost from the house in several ways. One way is by conduction through the envelope. Another way is by convection through leaks in the house. Most factors are known but several need to be looked up. Once you know those values for your area, you can use them again and again.
Let's establish those values. First you will need to establish your highest desired indoor temperature. During winter this might be 62°F or 65°F or 68°F. We'll use 65°F for this guide. Next you'll want to establish the coldest outdoor temperature that might be experienced. For the walls this might be 20°F or 0°F or -20°F if you're in Alaska. We'll assume 20°F for this guide.
Beware however that your crawlspace and attic will have different cold temperatures. If your insulation is in the ceiling plane instead of the roof plane, your attic will enjoy the comfort of being enclosed even though it won't be insulated. Therefore in 20°F weather the attic may register at 40°F. The same situation is present in the crawl space, especially if it's vented and any walls adjacent to a garage. We'll use 40°F for these three locations.
Using these temperatures establish a difference of temperature known as ΔT (delta-T). This is simply subtracting the coldest outside temperature from the desired indoor temperature. Using our established values the walls, windows, and exterior doors will have a ΔT of 45°F and the crawl space and attic will have a ΔT of 25°F.
Next you'll need to gather the areas of each of the parts of your building envelope. This includes floors, walls, ceilings, windows, and doors. Rather than figure the exact wall area, imagine there are no windows or doors. Then when you do the window and door areas, you can subtract them from the wall area to get a more accurate reading with less calculation. If you want to be especially precise, you can note the amount of wall against the garage, second floor walls against first floor attics, etc. We'll skip that precision.
The other thing you'll need to gather is the U-value of those components. U-value is the inverse of R-value. U-value should also take into account the whole assembly and not just the insulation itself. An R-21 batt does not equal an R-21 wall. A typical R-21 wall will end up at about R-16, that is, a U-value of 1/16 or .0625. A simple true R-value conversion can be had by multiplying your insulation R-value by a factor depending on quality. For a standard average build, assume 75% of your insulation value. For good construction (24" o.c. R-30 wall for example) assume 80%. If you're using exterior foam, figure your percentage value and then add the foam. For instance, an average R-21 wall works out to about R-16 but adding 1-1/2" of XPS foam adds R-7.5 for a total of R-23.5, U-value of .0426. More precision is better but don't go crazy.
Let's put it all together:
The general equation for each element is area x u-value x ΔT. You should write down the following:
- Afloor x Ufloor x ΔTfloor = Btu/hr floor
- Awall x Uwall x ΔTwall = Btu/hr wall
- Aceil x Uceil x ΔTceil = Btu/hr ceil
- Awindows x Uwindows x ΔTwindows = Btu/hr windows
- Adoor x Udoor x ΔTdoor = Btu/hr door
Next week: Infiltration!
Tuesday, May 24, 2011
Net Zero 100%
Meritage Homes, one of the nation's biggest builders has committed to building Net Zero Homes as their new building model. In some communities this is mostly true. They'll build about 75% better than code and give the homeowner the option to solarize the home to net zero. But this is not a complaint. For a large production builder to have found a net zero sweet spot raises the bar pretty high. So high in fact that many builders will either have to follow suit or get out.
http://www.greenbuildermag.com/News/Headlines/Net-Zero-for-the-Masses
How about you? Think you're good enough to net zero or will you keep playing with your old deflated ball? Need some help? Contact Istockhouseplans for plans that can help you achieve Net Zero Energy Use.
http://www.greenbuildermag.com/News/Headlines/Net-Zero-for-the-Masses
How about you? Think you're good enough to net zero or will you keep playing with your old deflated ball? Need some help? Contact Istockhouseplans for plans that can help you achieve Net Zero Energy Use.
Tuesday, April 5, 2011
Designer vs. Builder
"In this corner coming in at a lean 180 pounds and sporting a 3-button mouse is... The Designer! His house plans have sold nationwide but he has a beef so he has called his opponent into the ring."
"And in this corner weighing in at 205 and wielding a framing nailer is... The Builder! He has built houses nationwide and accepts the challenge by the designer."
"Let's get ready to rumble!"
Opponents? Maybe and maybe not. Let's look in a little closer...
Designer: "I very specifically drew out the dimensions for this tipout and you ignored it completely."
Builder: "Are you crazy? Have you ever tried to build something like that? It was too much work."
D: "How will you set this house apart and make it look good?"
B: "I thought that was your job."
D: "I did my job and you ignored it."
B: "Too much time for the payout. Maybe I'll paint the house light brown with dark brown trim."
Designer then tries to whip Builder with the mouse. Builder fires a few nails into the mouse and renders it ineffective. Both contestants leave the ring.
A draw? No, a lack of communication. In our experience we have found that designers and builders rarely (want to) discuss plans beyond the price tag. Those that have discussed plans are usually wanting to strip the house down to a bare square. The designer does the work because he is getting paid, but often against his values because he is being asked to design the wow factor out of the house.
Or perhaps it is a technical issue. The designer specifies to start joist layout at a particular point in order to avoid plumbing issues. The builder spaces evenly from the corner because it's easy and then gets mad at the designer for putting the toilet right there. "But I specified the second joist to be 10" away from the corner, not 16". "That messes up the plywood, besides it's not typical practice."
What to do? How about encourage open discussion? Every plan we sell, we ask the builder if we can discuss some of the points of it and why we did certain things. Sometimes a few bits and pieces are dependent on a single item. If that single item gets changed, the rest of the dynamic crumbles. So we want to alert the builder to such issues. No, not all plans are designed the same. It doesn't matter how many years you've been building.
What would really be ideal is for the builder to invite the designer out the job site. This accomplishes two things. First, the builder better understands what the designer had in mind. Second, the designer gets exposure to the job site and sees and learns how certain elements are put together and how particular builders tend to approach problems. The designer might also be able to suggest an immediate solution if something nosedives. Understandably, the designer should be in the office to conduct business. But if builders can be mobile, why not designers? With a laptop, car charger, and a cell phone, the designer could conduct business from on the road. Camp out at a jobsite for a few days, take orders and process them via wireless, offer solutions with realtime speed. Then off to another jobsite, bouncing around the lower east side for a few weeks before taking some time to support builders on the middle west side. Hit the northern burbs, then the next county, and get a good circuit going. You might even be the next preacher of the Gospel of harmony!
At Istockhouseplans we are happy to offer this service for free. And we know about a lot more than just design. We can help with onsite solutions for energy efficiency and building durability. And as a program ally of Energy Trust of Oregon we can assist with getting your details right to get the biggest incentive possible.
Tuesday, March 22, 2011
Instant Gratification
So you want to build energy efficient, durable, comfortable homes but don't want to commit to a program? Energy Trust of Oregon just released their Best Practices Pocket Guide to the general public. This is a pdf file that outlines many of the strategies that promote energy efficiency. Simple to read, simple to use, and filled with detailed drawings. Print it out and keep it in your back pocket or store it on your i-Device for jobsite reference. This tool is useful for designers, architects, framers, insulators, drywallers, plumbers, electricians, and
Istockhouseplans is an Energy Trust of Oregon approved program ally and has access to all these details and more. If you are looking for an efficient house to be built in Oregon, contact us or look through our catalog. All of our plans sold in Oregon include relevant details to meet Energy Trust's standards.
Get your copy at http://energytrust.org/trade-ally/programs/new-homes/resources/. Scroll down to Best Practice Pocket Guide and click the link.
Energy Trust of Oregon is an independent nonprofit organization dedicated to helping Oregonians benefit from saving energy and tapping renewable resources. Their services, cash incentives and solutions have helped customers of Portland General Electric, Pacific Power, NW Natural and Cascade Natural Gas save nearly $600 million in energy costs. Their work helps keep energy costs as low as possible and builds a sustainable energy future.
Tuesday, January 4, 2011
Does your equipment blow or suck?
Happy twenty-'leven from Istockhouseplans to all of our friends out there in cyberland. We hope your holiday was interesting and thoughtful. A quick note about our year-end report: despite the down economy, our books show that we made twice as much in 2010 as we did in 2009. Thanks to everyone who made that possible, and here's a toast to all of you that your books did and will do the same for 2011.
Now, to the topic at hand. A strange thing happened over the holidays. The building that we work from is heated with a forced air gas system, commonly known as a gas furnace. It was recently insulated and air-sealed. Somebody kicked a heat register shut and the tighter house acted differently. In this case something happened. Before, nothing would have happened. This lead us to a little investigation.
First off, a house is a closed system but not entirely. It is impacted by the outside environment to some degree. The more a house is insulated and air-sealed, the more you reduce the impact from and to the outside environment. This means you get more reaction within the house when something changes. What changed in this case was air pressure. By shutting a heat register, suddenly more blown air is directed to other registers. In a tight house, this air is supposed to balance by going into the return register, through the furnace where it is warmed, and back through the registers.
Now imagine that air that is blown into a bedroom can't return to the furnace. That is, it is blown in but there is no way for it to get out. This might be the case where there is carpet and the door is shut leaving a paper-thin space between the bottom of the door and the floor. A little air will get out but now the system will be imbalanced. Kind of like filling a balloon. More air goes in, but none comes out.
But the air has to go somewhere. With a balloon, it will stretch the environment. Unfortunately drywall is not as pliable as rubber. So the air goes where it can, that is through tiny cracks. At some point the room reaches critical mass for pressure. This is when things start to happen.
Much like a pipe that has been corked off, the air stops flowing through the duct. It might back up and force more air through another register up or down the line. If it is a dedicated duct run with no other outlets, it will back up into the furnace. So what you have is two pressurized environments doing battle. Try this: grab a straw and a loved one. Each of you put one end of the straw in your mouths. Now both blow as hard as you can. Cheeks will turn red, eyes will bulge, and finally someone will get a mouthful of the other one's air. This is called system failure.
In the case of your furnace you could simply blow a duct. However with today's tighter duct runs, the weak spot becomes the furnace, most notably the blower fan. So the fan has back pressure causing two forces to exert their will upon it. At some point the fan gives in and stops blowing. The furnace still warms but the forced-air part has been taken out of the equation. This tends to happen on the coldest day of the year on a Saturday night.
Granted, one single room is probably not going to have major adverse effects on the HVAC system. But imagine an 1800sf three bedroom house. The furnace is likely to be oversized (60kBtu) and the master bedroom might have two heat registers due to it's size (~200sf) as well as a heat register in the master bath and maybe one in the master closet. The door is closed and there is no appropriate 1" undercut. In fact, you would need about a 4" undercut. Air gets backed up in the room. Your head hurts. Then the furnace quits. You thought it was just the end of the cycle but it doesn't turn back on and the temperature continues to drop. At first you assume a power outage but the VCR clock is still blinking '12:00'. The next day it's even colder in the house so you call the HVAC tech. He says he'll be out there sometime between 9a and Friday.
The bugger is that your house was built last year.
Before buying a new house, ask if the system was properly sized. There are a slew of manuals and related software out there for professionals to use. As a builder, always ask your HVAC tech how they arrived at the necessity to install an 80kBtu furnace. Also ask how they are going to mitigate zonal pressure relief. If they stare at you or stutter or write it off, hire someone else.
In the meantime, Istockhouseplans recommends not using forced air systems. We push for hydronic floor heat, so called 'soft' heat (electric baseboard) and mini-split heat pumps. All of these systems take less space and use less or no air. They can also be sized more appropriately than a furnace can.
Don't forget to check your filters and consider cleaning your ductwork. Oh, and if your head hurts in your bedroom, simply try opening the door. Stay tuned for next time when we'll look at some more zonal pressure relief options.
Tuesday, November 2, 2010
Hey baby, what's your... sign?
 One of our local builders that we team up with, Cutting Edge Homes, is in the process of building some of our latest drawings. Clackamas County is showcasing his homes for energy efficiency and has invited commissioners, legislators, and the general public. The idea is to show off some energy efficiency measures and help folks understand what they should expect in new homes. In this case is improved air sealing, improved insulation, tankless hot water heaters, and one unit with ducts inside the conditioned space.
We thought the event made perfect sense to flash a little leg, as it were. After all, SOMEbody had to design the energy efficiency into these things and make sure they were going to exceed code. So we had some lawn signs made up and stabbed them into the dirt on the jobsite. You can see that our design prowess is not just limited to buildings, but advertising as well. Perhaps.
The event will be November 10th at 3p at 14848 SE Arista Dr. Milwaukie, OR. Come out and see what things are happening and to introduce yourself.
Thursday, April 22, 2010
Happy Earth Day
We here at Istockhouseplans believe that every day is Earth Day. That's why we design energy efficiency into all of our plans. And to make up for our length of silence, we'll be releasing several new plans with our next update. Our average square footage has been slowly reducing since our inception. Smaller square footage means less material use which means less of an impact on the earth. All of the plans we'll be releasing are under 1500sf and one of them is only 300sf.
What are YOU doing for Earth Day?
What are YOU doing for Earth Day?
Tuesday, March 30, 2010
Advanced Placement
Energy Trust of Oregon in their never ending quest for energy efficiency in that great state recently introduced their new incentive path for homes. Called Advanced Performance, this path breaks the bar in many ways. Most of us are used to designing and building 2x6 walls. This is going to be a bit of a challenge now. And we're not going to get to do post and beam floors anymore. Here are the specs:
This isn't your Father's energy efficiency path. This is some serious action going on. We at Istockhouseplans are rather excited about this path and would love to help your home achieve it. If you'd like to build any of our plans to this standard, we would be happy to modify it for free. That's right. As a program ally of Energy Trust of Oregon, we'd be so excited to see a home like this get built that we'll do what we can to make it happen. Contact us if you'd like to learn more.
- Framed floors: R-38 joisted (P&B results in leaky floors and/or saggy insulation)
- Slab floors: R-15 full slab with perimeter break
- Walls: U-0.025. This means R-40 assembly, not just R-40 insulation. Either thicker walls or better insulation is required
- Windows: 15% of floor area, U-0.22 weighted average
- Doors: R-5
- Ceiling: U-0.016. Like the walls, this means R-60 assembly, not insulation
- Heating: 8.5 HSPF/13 SEER or better ductless inverter driven heat pump
- Ventilation: HRV/ERV with 70% sensible recovery efficiency
- Tightness: 2.5 ACH50 or better
- Lighting: 90% CFL
- Incentive: $4,000 plus state and federal tax credits
This isn't your Father's energy efficiency path. This is some serious action going on. We at Istockhouseplans are rather excited about this path and would love to help your home achieve it. If you'd like to build any of our plans to this standard, we would be happy to modify it for free. That's right. As a program ally of Energy Trust of Oregon, we'd be so excited to see a home like this get built that we'll do what we can to make it happen. Contact us if you'd like to learn more.
Tuesday, January 5, 2010
Putting our Watts where our Mouth is
For a couple of years now Istockhouseplans has been talking all about energy efficiency and how you should be including it in the homes you build. We've talked about stud spacing, floor joist spacing, truss spacing, thicker walls, advanced framing, and modular design. We've given you plenty of advice (solicited and un-) about what we think the world should be like.
But unlike the doctor who discourages you from smoking and then asks for a light, we can back up our claims. As part of our partnership with Energy Trust of Oregon, we are having our plans energy modeled. We'll start with a base code score and then suggest a few improvements that would be the most suitable regarding energy efficiency and your wallet. If you decide you want to get a lot more creative in your build (R-30 walls?), we can run a preliminary score for you to see how much better your home would be.
We'll spend the next few months updating our portfolio with these numbers and then give you the results. While we don't expect usage numbers in the teens (70's-80's is average), we do expect that you'll be able to give your buyers a more complete picture of their new home. Just another service that Istockhouseplans offers.
Tuesday, December 22, 2009
Twenty-Six Point Two
Give up? Maybe you should check out this water heater and see what it means. Fuel usage? Cost? Size? Some strange puzzle based on the bizarre and random thinkings of the post author?
The Marathon hot water heater by Rheem is one of the most efficient tank heaters on the market. We appreciate that it comes as an electric unit. Since electric heat is practically 100% efficient, it makes sense that an electric tank water heater should be up there. The biggest problem with tanks is their standby losses. Leave home for a week and the tank will happily use your utilities to keep the water warm for you the whole time. With efficiencies as high as 94% it is touted that water in the Marathon will stay hot for up to 2 weeks. Awe. Some.
Another interesting player in the game is the Ruud heat pump water heater. Quite a mouthful. This unit combines both technologies into one device and claims an efficiency of 200%. This really shouldn't surprise you if you understand how heat pumps work. Some of the best heat pumps are currently 350% efficient. This water heater works like a refrigerator in reverse. Rather than spit out heat, it grabs it from the air and heats the water with it. We think it would make perfect sense to install one of these next to a fridge and let them work in tandem. Your fridge might appreciate the heat transfer.
We do not own stock in, get money from, or have beers with the representatives of either of these companies. We just think their products are ubercool and we would install them in our own homes. The only thing stopping us is the money that we would get from you buying one of our plans. Of course, istockhouseplans would be happy to specify any water heater you like including a black rubber bladder sitting in the sun. It's your house after all.
Subscribe to:
Comments (Atom)


