
The APA (those wood people again) have issued a report on raised heel (AKA energy) trusses. Typical trusses do not allow full height insulation out to the outside edge of an outside wall. This means that the thermal envelope of your house is compromised where the roof comes down to the wall. This would be akin to the back of your neck where your coat doesn't quite reach up to nor does your wool hat reach down to. So consider raised heel trusses to be a scarf for your home.
Builders harumph about several issues. Mainly plywood and siding and the extra cost. How much extra cost, Captain Pennypincher? Yes, it does cost extra. But could you perhaps use all those drops from your sheathing in that extra 8-12" space? But the taller blocking is also a somewhat valid point
The report gives some simplified methods for securing the trusses without complicated blocking. The report is applicable for trusses with a heel between 15-1/4" and 24"; using continuous plywood (CS) as a prescriptive shear bracing method; for homes in seismic zones A, B, and C; for homes with wind exposure of 110mph or less; a whole list of other fairly typical conditions.
In essence, plywood has been found to be adequate to replace blocking between the tall trusses for all but the top chord itself. That is, rather than using stacked 2x12's (illegal anyway) or a truss company built blocking solution, the plywood can extend to the bottom edge of the top chord. Typical 2x4 bird-blocking can be used on top of that.
Thankfully, you as a builder do not have to figure this all out. Talk to your designer about simplified solutions for energy heel trusses. Here at Istockhouseplans, we're always happy to help you get the most bang out of your buck.
See the full report here (an account or login may be required):
http://www.apawood.org/level_c.cfm?content=pub_searchresults&pK=Form%20SR-103&pF=Yes
Showing posts with label insulation. Show all posts
Showing posts with label insulation. Show all posts
Tuesday, April 29, 2014
Friday, December 13, 2013
Advanced Framing Techniques in Video
The APA (Y'know, the plywood people) recently unveiled a new video outlining advanced framing and how easy it is to achieve in your building. If you're still building at 16" o.c. with redundant studs at corners, windows, and T-walls, see this video. These techniques actually ask you to do LESS in your building while achieving cheaper costs, a more comfortable home, environmental friendliness. If you still balk then I won't stop you from building substandard home. But for the future of your income, please at least consider staging these techniques into your repertoire of framing practices.
By way of reminder, it's not the number of studs that keep your house from blowing down or siding from warping, it's the use of plywood gapped per manufacturer's specs that achieves strength and durability.
By way of reminder, it's not the number of studs that keep your house from blowing down or siding from warping, it's the use of plywood gapped per manufacturer's specs that achieves strength and durability.
Tuesday, June 18, 2013
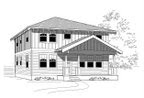
Garage to ADU Conversion Problems
When doing math it sometimes gets tricky in the conversions. How many litres in a pint? How many centipedes in a decibel? Likewise it can get tricky converting a garage to an ADU. Let's pretend that your local jurisdiction is not an issue and look at the inherent problems. (Note, please always consult with your local jurisdiction and get a permit where required.)
The first issue would be the floor. Most contractors would be happy to leave the floor as a slab and call it good. Maybe put a carpet over it. Nothing could be worse. You have no idea what's under that slab. It could be sand, gravel, or bare dirt. There may or may not be a vapor barrier under there either. Concrete is nothing more than a rigid sponge. Placing a carpet over the top just gives latent moisture somewhere to make dank and moldy. Don't do it.
Instead, consider laying some 6 mil vapor barrier down over the slab first. There is likely no insulation under there either so a few inches of rigid foam insulation would help to keep the dewpoint away from your materials that are susceptible to mold. After making sure all joints are sealed, overlay with a floating wood floor. Looks nice too.
Hopefully walls and ceilings would be straightforward. Always check for and mitigate any moisture in the walls, make sure the wiring is correct, and get inspected if necessary before applying sheetrock. Fill the space with insulation before making it inaccessible.
Another big issue to consider is the street appeal. The general rule of thumb is to throw some sort of window into the former garage door opening and frame around it. This looks wrong on several levels. First, the garage door header is generally not equal to other windows or doors. If the garage is freestanding then this is less of an issue. But if the garage door is near other windows and doors it can look discontinuous.
The expensive option is to cut out the header and make it the same as other headers on the front of the house. Another option would be to consider something such as two 3/0x5/0 single hung windows. The vertical aesthetic of the windows can help soften the horizontal issue. Another option which happened near here was to remove the garage door but build an inside wall that looks like a garage door from the outside. Windows were already on the side of the garage. This looked really nice. Unfortunately the local jurisdiction in all their wisdom required a window in the front. In vulgar terms it looks really dorky now. Perhaps a sliding glass door could be considered as another option.
Another issue that can come up is the parking space. If you have less than 16' in front of your garage to begin with you may lose an onsite parking space. Some jurisdictions might think this a big deal. Others won't. A driveway going up to a blank wall does not fool the eye. We have grown to expect a garage door at the end. If that garage door is gone then the driveway needs to be reimagined in order for the eye to accept a wall at the end.
If there is room then landscaping or a bench will help soften the transition. The amount of concrete in the driveway could also be reduced. Leave a couple of 30" strips with 24" between them. Everything else should be returned to grass or other low, resilient plantings. If your budget allows, put in driveable molds or spaced pavers that allow grass to grow in between them. Some folks may not appreciate the look of parking a car in grass but it may suit others' needs.
If you are converting a garage into an ADU, Istockhouseplans would be pleased to give advice. Send us an email or leave a comment below.
 |
| Looks normal but the owners want more living space |
The first issue would be the floor. Most contractors would be happy to leave the floor as a slab and call it good. Maybe put a carpet over it. Nothing could be worse. You have no idea what's under that slab. It could be sand, gravel, or bare dirt. There may or may not be a vapor barrier under there either. Concrete is nothing more than a rigid sponge. Placing a carpet over the top just gives latent moisture somewhere to make dank and moldy. Don't do it.
Instead, consider laying some 6 mil vapor barrier down over the slab first. There is likely no insulation under there either so a few inches of rigid foam insulation would help to keep the dewpoint away from your materials that are susceptible to mold. After making sure all joints are sealed, overlay with a floating wood floor. Looks nice too.
Hopefully walls and ceilings would be straightforward. Always check for and mitigate any moisture in the walls, make sure the wiring is correct, and get inspected if necessary before applying sheetrock. Fill the space with insulation before making it inaccessible.
Another big issue to consider is the street appeal. The general rule of thumb is to throw some sort of window into the former garage door opening and frame around it. This looks wrong on several levels. First, the garage door header is generally not equal to other windows or doors. If the garage is freestanding then this is less of an issue. But if the garage door is near other windows and doors it can look discontinuous.
 |
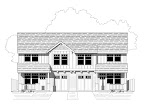
| Slap in a window. Well, it's functional at least. Yeesh. |
The expensive option is to cut out the header and make it the same as other headers on the front of the house. Another option would be to consider something such as two 3/0x5/0 single hung windows. The vertical aesthetic of the windows can help soften the horizontal issue. Another option which happened near here was to remove the garage door but build an inside wall that looks like a garage door from the outside. Windows were already on the side of the garage. This looked really nice. Unfortunately the local jurisdiction in all their wisdom required a window in the front. In vulgar terms it looks really dorky now. Perhaps a sliding glass door could be considered as another option.
 |
| This looks a little more purposeful... |
 |
| A cabin perhaps? May or may not work. |
Another issue that can come up is the parking space. If you have less than 16' in front of your garage to begin with you may lose an onsite parking space. Some jurisdictions might think this a big deal. Others won't. A driveway going up to a blank wall does not fool the eye. We have grown to expect a garage door at the end. If that garage door is gone then the driveway needs to be reimagined in order for the eye to accept a wall at the end.
If there is room then landscaping or a bench will help soften the transition. The amount of concrete in the driveway could also be reduced. Leave a couple of 30" strips with 24" between them. Everything else should be returned to grass or other low, resilient plantings. If your budget allows, put in driveable molds or spaced pavers that allow grass to grow in between them. Some folks may not appreciate the look of parking a car in grass but it may suit others' needs.
 |
| Sweet Stickley, can we live here? That bay, that driveway. What lovely lines! |
If you are converting a garage into an ADU, Istockhouseplans would be pleased to give advice. Send us an email or leave a comment below.
Tuesday, December 6, 2011
Energy Efficient Wall Systems
You may remember our post a couple of years ago promoting Fat Walls. In their 11/11 monthly newsletter, Energy Design Update recently reported on 15 different wall assemblies modeled through TRNSYS software. The walls were simulated in the climates typical to Atlanta, Pittsburgh, and Phoenix. Of the 15 walls, three tied in first place for an overall value of R-43. One of these walls fills a 2x6 cavity with closed cell polyurethane spray foam for a rather high price tag. The second wall involves 10" thick SIPS. The third wall is our option number four from the previously mentioned post with 2" more of foam. That is, a 2x6 wall with blow-in and 4" of outboard XPS foam. As we mentioned back when we wrote the initial post, this makes window detailing a bit of a bear. Attachment issues come into play as well. The advantage of this system is the standard wall framing and no loss of floor space inside the house.
A reasonable compromise might be 3" of foam. This allows the use of true 2x4 for bucking out windows while allowing 1/2" air space. Half inch furring strips can then be used over the foam for attachment as well as a rainscreen.
They also modeled a similar wall as our top choice, double 2x4, total 8" thick with 2" of outboard foam. Our results? R-40 with U-0.20 windows. Their results were R-38 with U-0.25 windows. As you should know, U-0.20 windows are slightly better than U-0.25 resulting in a slightly higher total wall R-value.
So apparently we know what we're doing!
Tuesday, September 27, 2011
Istockhouseplans Gets Greener
As more and more companies are beginning to do a life cycle analysis of their products, Istockhouseplans feels that this is a worthwhile study to pursue. Generally we will send you a half dozen sets of plans. Most of those will go to the permitting jurisdiction for approval; some of those you will give out to subs to do their work. What's left is a few sets around the jobsite that get muddy, or a couple extra sets that get stuck under the seat of your F-350. We've compiled this list of how you can safely, humanely, and environmentally end the life of those plans.
Other ideas? Please feel free to share in the comments. Want to employ some of these ideas yourself? Visit our plan catalog and purchase your own set.
- Recycle them in the paper bin. Duh.
- Ship them back to us for proper disposal.
- Shred them for landscaping mulch.
- Shred them for attic insulation.
- Shred them for party confetti.
- Sweep up your wood dust and roll it up into a set of plans. Smash the ends in and leave a few next to the woodstove or outdoor fireplace for the new homeowner to burn.
- If you have a nice set leftover, present them to the homeowner. Possibly even in a frame. Or take the time to mount them over the fireplace yourself. Build the frame out of scrap wood from the site.
- If a set gets too muddy to use, wrinkle it up good, re-flatten it and set it in front of an exterior door for a shoe mat.
- Cut strips to use if you run out of drywall tape.
- Separate the sheets and fold them into origami for the children who are pressing their faces into your cyclone fence.
- Let your kids color the elevations.
- Use the backs as large blank sheets for your kids to color on.
- Make holiday cards for your subs/supers/suppliers using the elevations or details as the front picture.
Other ideas? Please feel free to share in the comments. Want to employ some of these ideas yourself? Visit our plan catalog and purchase your own set.
Tuesday, February 24, 2009
Fat Walls
As a follow up to our previous post regarding Passive Houses, we would like to explore some options for making a wall more insulated. Code allows for the wall to be less insulated than the rest of the home. While a roof is R38 (all figures are for the Northwest) and floors are R30, walls are only required to be R21. This is 33% worse than floors and only half as good as roofs. On top of this, walls have all these nasty holes called 'windows' that reduce the actual value down to R13 at best. This makes the walls a full 2/3 worse than the roof.
"Well that's okay, because heat rises, right?"
No. No, and no. Hotter air rises above colder air but heat moves any direction from hot to cold. Ideally a house should be equally insulated on all planes. This means we need to get walls up to the R30 to R40 range.
First option: Standard wall of actual R13 plus 4" of XPS rigid foam board gets you to R33. Not bad, but 4" of foam really messes with window openings and requires some extra detailing.
Second option: Advanced frame 2x6 wall with actual value of R18 plus 2" of same foam gets up to R28. Not bad, but not enough.
Third option: Add U=0.20 windows (R5) to this wall and start touching R30.
As you can see, there's not much left to do except...
Fourth option: Increase wall to 2x8 advanced framing (R24 actual) with 2" foam to get R34.
Our current favorite option: Two separate 2x4 walls with a 1" air gap in the middle and 2" of XPS foam on the outside, U=0.20 windows. This gets up to an R40 and is easy to frame. One wall is built to standard advanced framing, then the second wall is built with a minimum of lumber. All it has to do is hold gypsum in place. The gap at windows and doors is bridged with plywood gussets. This means the window openings will have to be 1/2" bigger on each side. Every extra inch of gap you'd like to add will increase the insulation value by another R3-R4.
"But I'm going to lose floor space in the house!"
Really? How much will you really lose? A standard 40x40' house with a 20x20' garage in the corner has 160' of perimeter. Two and one-half extra inches of wall reduces your floor space by 33sf. We're talking powder room or walk-in closet. And besides, if you're more worried about the little amount of floor space over an energy efficient home, we'd like to have a talk about priorities.
Besides, Passive House promotes 12". We're just advocating little steps.
If you'd like to hear more about these systems, drop us a line or visit istockhouseplans website.
Tuesday, February 10, 2009
Passive House
Last post we discussed some interesting ways to increase the R-value of your walls while still maintaining normal and acceptable building practices. But let's say you want to take it a step further. Welcome the Passive House, a remarkable building process started in Germany and quickly becoming a popular method of building homes. Passive houses require no heating source but are generally required to have one per code.
"Wait, no heating source? No furnace, no baseboard heaters, no heat pump, no radiators?" Yup. I mean, nope, none of that. The homes are built so tight and insulated so well that they get heated every time you use a hair dryer or brew coffee. In fact you could keep the home heated all winter with a few well placed candles.
"But if the house is built tight and you're burning candles, won't you die of carbon monoxide inhalation? Shouldn't the house breathe?" Oh for the love of Pete, if your house 'breathed' you would be making monay selling tickets to an authentic haunted house. Houses don't need to breathe. The occupants inside need to breathe and yes you need to cycle fresh air through.
Performance issues first. R-values need to be 44 or better. This does not mean using R-44 insulation. This means the average value of your whole wall, including energy sucking R-3 windows, needs to be accounted for. Floors and ceilings need to achieve the same values. Currently these values are in the R-10 range for walls (using R-21 insulation), and R-30 for floors and ceilings assuming no penetrations. So the solution for floors and ceilings is simple, increase the value to R-49 in both and call it good. The walls are a little more difficult. How would you achieve an R-50 wall? One method is to use 9.5" I-joists for studs and fill the cavities with either spray foam or high-density blow-in. This gets you to R-38, and then add 3" of EPS rigid foam board to the outside. Typical windows are as good as R-3 (U=0.32), but R-7 (U=0.14) windows can be used.
Typical houses leak at a rate of 10 or so air changes per hour when you suck out 50 CFM of air. An Energy Star home cannot exceed 7 and 2 or 3 is generally considered darned good. But the Passive House must not exceed 0.6 ACH at CFM50.
"Oh the cost! This would be a fortune!". How much do you think it really is? Since R-5 windows are about the limit available in the U.S., you are looking at roughly an $8000 increase for a modest 2000sf home (foam is cheap). Not terrible, but here's the kicker. You can skip the HVAC system, so there's a $4000 savings. Instead you'll install a small HRV system to provide fresh air to the home without it adversely affecting temperature. Add about $2000. You'll also want to provide a couple of small cadet heaters so add another $1000. So you're in it for $7000 extra. But when you sell the house, market it well and you'll gain an extra $20,000 over similar homes. Why? Because the heating/cooling bills will be reduced from $200/mo to less than $50/mo. The extra $20k will finance at $120/mo. Math says that your buyers will save a few bucks a month or break even. That assumes that energy costs will stay stable. If you believe this, I've got a barn to sell you. So consider that this becomes a hedge against future energy costs and your buyer breaks even and gets a more comfortable home.
If you'd like your next house to be aggresively passive, we would be happy to detail it for you.
Tuesday, January 27, 2009
What a stud!
What makes the Northwest unique? Green trees, pristine beaches, and live volcanoes? Yes, but what makes building homes in the Northwest unique? Give up? It's the size of stud used. Throughout the rest of the country builders rely on the trusty 2x4. But here in the Northwest the energy code has demanded that the 2x6 become the weapon of choice. So what do we do with the 2x6? We space them 16" apart and fill the cavities with R-21 insulation. Every where else they do the same thing but max out with R-15 high density batts. Crazy! While Portland, OR uses R-21 for it's 4600 heating degree days, Minneapolis allows R-15 for it's whopping 8000+ heating degree days. Seems insane to me.
Now, let's say you want more insulation. You could use the 2x6 stud, but keep in mind your wall will still be 33% - 50% less insulated than your floors or ceiling. (That's okay, heat rises, right? Okay smart guy, if that's the case, why insulate your floor? 'Heat' does NOT rise). Digressing, you can see that your walls are seriously hampered compared to your hat and socks. How do you feel about 2x8 walls with R-25? Not well, I suppose. But what about 2x6 walls at R-21 with (wait for it) 2" of EPS rigid foam insulation? Suddenly you've come close to R-30 for your wall. Not bad, eh? And if you're still stuck on 2x4 studs with R-15, 3" of EPS rigid foam will bring you to a more comfortable R-27. Besides that, exterior foam makes a great thermal break between your studs and the outside world.
Since Istockhouseplans is a Northwest company, we've been used to the idea of specifying 2x6 studs on all of our plans. If you are a builder anywhere else, please don't let that stop you from using our plans. Simply use our blueprints and replace the studs with 2x4. Though our drawings show 6" thick walls, our details specify that either 2x4 or 2x6 are acceptable. If it's really a breaking point with your jurisdiction, let us know and we'd be happy to redraw the plans at no extra charge. That's our service to you.
Tuesday, January 13, 2009
Are you up to code?
Have you heard this question before? Water cooler, permit office, job site? What does up to code mean? Does it mean your home complies with code? Good. But what does code really mean? Have you ever tried to build a home below code? Have you gotten away with it? Has it come back to bite you?
Enough of the inquisition. A code home (if your jurisdiction has a code) is the MINIMUM home you can legally build. In other words, if you built a home any less than code, you could go to jail. So a code home is the worst home you can build without getting into legal trouble with the state. Is that how you're defining your company, by building the worst homes possible?
If you couldn't tell that we were in a housing slump, good for you. If you're out there trying to market your homes for 30% less than list price without success, let me tell you why. It's because your home is the worst home legally allowed. Meanwhile Joe Toolbelt has upped his ante and is putting energy efficiency features into his homes and they're selling. What's that mean, bamboo floors and low VOC paints? No, that means 24" o.c. studs, increased insulation values, a quality heat pump or 95% furnace and a myriad of other features that make your house use 30% less energy than before. "Won't that cost extra?". No, no, and no. You've made it obvious that there is a learning curve, but you've also shown me that you've broken that before. The 1992 code shattered all your ideals, but you got the hang of it. Now I'm telling you to do it again.
If you are a GC, get energy efficiency figured out, then talk to your subs. I'll bet your subs would frame in a monkey suit right now if it guaranteed they would get your framing job. Tell them how you want your house built, and tell them that you have no qualms about dropping them midway through the project if they're not doing it right. Are you a sub? Figure out the energy efficiency for your trade and market yourself for the same price as before.
If you can figure out new technology like pneumatic nailers and factory-built trusses, surely you can do better than 80% furnaces and batt insulation. Need help? Come to istockhouseplans and get our energy efficiency details with every plan.
Tuesday, October 21, 2008
Are you a Master Craftsman?
Hey Joe Builder, how would you define the quality of your work? Above average? Awesome! But it is statistically impossible for everybody to be above average. Better than most? It is also statistically impossible for everyone to be better than most everybody else. But I'm willing to give you the benefit of the doubt if you'll just answer a few questions:
1. What sort of measurement tolerance out of plane are you comfortable with?
A. Huh?
B. As long as it all comes together
C. As long as my eyeball doesn't notice
D. I am familiar with a crowbar and sledgehammer
E. Absolutely none! I don't know why it takes me a year to build...
2. What do you do with bowed studs?
A. Never seen one
B. Give 'em a kick
C. Crown 'em to the outside
D. Shims and a plane
E. I only use #1 grade lumber everywhere
3. How many dumpsters does it take to clear your site after a home is finished?
A. As many as it takes!
B. 3 or more
C. 1-2
D. I sort all of my waste for recycling
E. My purchase orders have a 0% overage estimate
Scoring: 1 point for each A answer, 2 points for each B, etc.
How did you do?
3-7 points: Please, for the environment's sake, STOP BUILDING!
8-10 points: You are the norm and could learn some things for a better bottom line.
11-14: Nice work buddy, our hat's off to you.
15: We bow to your craftsmanship but worry about your mental health.
Why does this matter? Because you could be saving money, energy, time, and materials by learning to build more energy efficient. Our details are a good start. Talk to your local utility or bookmark www.buildingscience.com to learn about more efficient building techniques. Especially now, your bottom line matters. Email us if you'd like to learn more.
Tuesday, September 23, 2008
What's your R-value?
You've just bought 200 rolls of pink insulation at your local big box hardware store. You look at the bag and see R-21. You're in a crunch so you jam the insulation into the walls, give it a quick once-over and have your inspection. Your inspector approves so you jam on and get the sheetrock installed. The question is, what is the R-value of your wall? R-21? Think again.
R-21 refers to the insulative factor of the fiberglass. This fiberglass only exists between your studs and plates. Standard framing of 16" o.c. with full headers results in up to 25% of the face of your building being wood alone. "Okay", you say, "So 75% of my wall is insulated, right?". Well don't forget about your windows and doors. Those can account for up to 15% of your walls. So only 60% of your walls is actually pink fiberglass. Then we must consider how well you installed. First of all, did you staple the kraft paper to the edge of the studs, or just inside the opening? "I stapled it inside, otherwise it interferes with the sheetrock." How about gaps between pieces of insulation or within cavities. "Just a little bit here and there, definitely not more than 3% of the wall." How did you handle wiring and plumbing or electrical boxes? "Um, shoved it in behind... why do you ask?"
Thanks for your curiosity. Let's do a little bit of math to answer your question. First off we must understand what a U-value is. It is simply the mathematical inverse of R-value, that is: U=1/R. If you pull out your calculator, you'll see that the U-value of R-21 insulation is about 0.05. For your reference, wood has an R-value of about 1.25 per inch so a 5.5" stud will have and R-value of 6.88 and a U-value of 0.15. Your windows are probably U=0.40 (which equates to R-2.5). To figure out the R-value of your entire wall, multiply the percentage of a given area by it's U-value, then add all the figures together and finally take the mathematical inverse. In this case, our equation would be:
1 / ((60% x 0.05) + (25% x 0.15) + (15% x 0.40)). This is your insulation, wood, and windows.
1 / (0.03 + .0375 + 0.06) = 1 / 0.1275 = R-7.84.
"7.84? Are you sure that's right?". Well, we rounded for convenience but it's close. Without rounding we get R-8. Oh wait, we didn't consider that you left a 3% gap in your insulation job. That little 3% void area reduces your insulation value from R-21 to R-11. Oops. So recalculating with a U-value of 0.067 instead of 0.05 drops your (unrounded) R-value of that wall down to 6.62. Not good.
"Well I gave it my best shot, that's the way it is. Besides that's how most builders do it."
You're right, that is how most builders do it. Way to blend into the crowd and not differentiate yourself. There's a green wave of consumer awareness breaking and anyone not on board will get washed away.
If you're interested in how to fix this, read on.
First problem is the framing. You really should be spacing your studs at 24" o.c., using two stud or modified three stud corners, and only putting headers where necessary. These steps can reduce your lumber from 25% of a wall to 15%. That's a 40% reduction in your lumber bill. Still think building green is more expensive?
Second problem is the pink insulation. It can never be perfectly installed (although it can get close). A better alternative is blown-in batts (AKA BIBS), spray cellulose, or spray foam. Yes spray foam is expensive but the BIBS system is comparable in cost, fills all the voids, and offers better insulation overall (R-23 vs. R-21).
Third problem is the windows. Quite frankly a U-value of 0.40 is not that great. Better to use U-0.32 or less.
Given these three factors your new equation will be:
1 / ((70% x 0.05) + (15% x 0.15) + (15% x 0.32)) =
1 / (0.03 + 0.02 + 0.05) = R-10
Better, but you'll notice it's still not R-21. That's the whole point. We want to let you know that despite all your best efforts, a 2x6 wall will still only reach half of what is perceived as it's potential value. If you really want good walls, consider sheathing the outside of the framing with rigid foam insulation, building a double wall, or using SIPS. Some SIPS manufacturer's claim comparable R-values of 50, though this is in comparison to the perceived R-21 value of walls. Still this results in a true R-value of R-20 or more compared to your stick frame wall of R-10.
Caveat Emptor.
Subscribe to:
Comments (Atom)


